Over the years, I’ve found that many white chocolate macadamia nut cookie recipes tend to be overly sweet or greasy. Because white chocolate is naturally sweeter than dark or milk chocolate, and macadamia nuts add a lot of richness, these cookies can quickly feel heavy.
I tested this recipe countless times to get the balance just right: a not-too-sweet cookie with golden brown, crisp edges and a soft, chewy center.
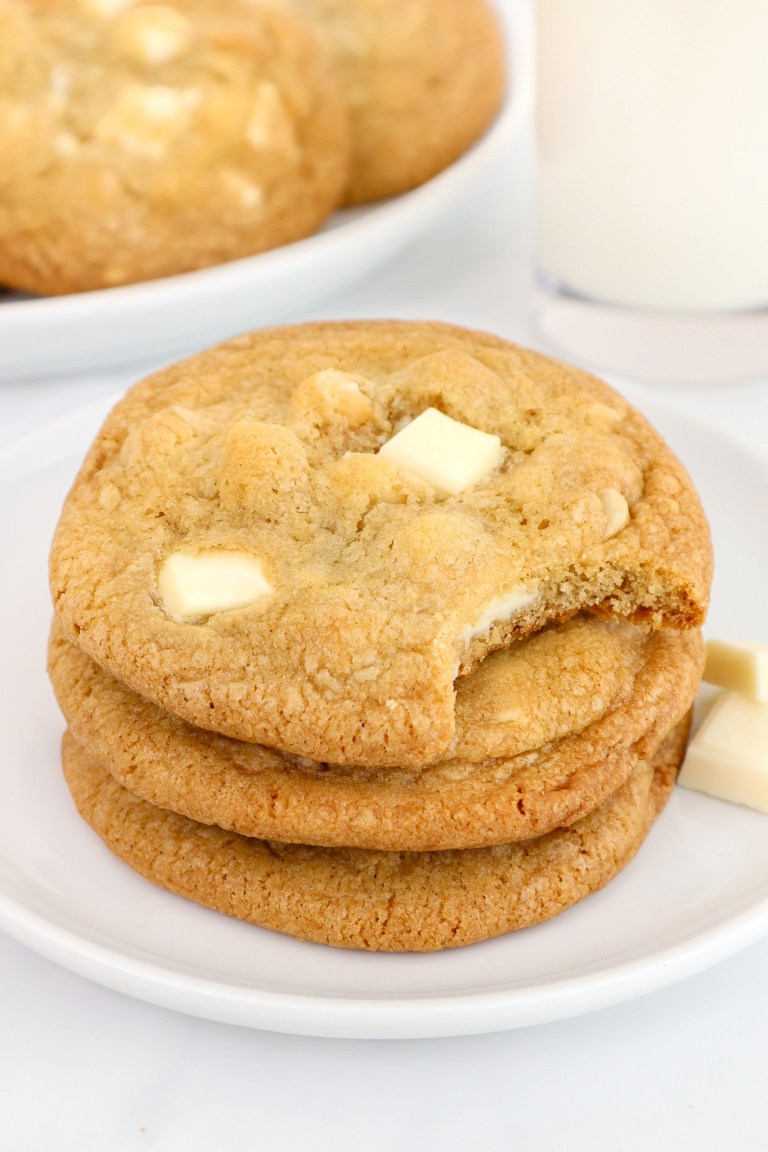
White Chocolate: Bars vs. Chips
For the best flavor and texture, I recommend using a good-quality white chocolate bar and chopping it into chunks.
I have found it increasingly difficult to find real white chocolate chips. Many products are labeled as “white chips” or “cream chips” because they do not contain real cocoa butter. Real white chocolate is made with cocoa butter, which gives a richer flavor and creamier texture than products made with vegetable oils. If using chips, be sure to check the ingredient list and verify that they are made with cocoa butter.
FAQ
Why did my white chocolate macadamia nut cookies turn out puffy or cakey?
Cookies can turn out puffy when too much air is incorporated into the dough or there is too much leavening. To prevent overly thick or cakey cookies, mix the butter, sugar, and eggs on low speed and only until combined. There is no need to mix until the batter becomes light and fluffy. The goal is to incorporate as little air as possible while still creating a smooth, evenly mixed dough.
Why are my white chocolate macadamia nut cookies greasy?
White chocolate macadamia nut cookies have a tendency to feel a little greasy because both white chocolate and macadamia nuts contribute a considerable amount of fat. To prevent overly greasy cookies, be sure to measure the ingredients carefully (especially the butter) and ensure you do not underbake them. While the centers should remain soft and chewy, underbaked cookies can sometimes feel greasy.
Do I need to chill the dough before baking?
Yes. I recommend chilling the dough for at least 4 hours (and ideally overnight) to achieve the proper texture and to control how much the cookies spread. Skipping this step can cause the cookies to spread too thin in the oven. Chilling, or “aging”, the dough also gives the flavors time to develop!
Why didn’t my cookies spread?
Cookies may not spread properly if too much flour is added or if the butter and sugar are not measured accurately. For the best results, spoon and level the flour and measure all ingredients carefully. I tested and developed this recipe for the perfect balance between chewiness and spread without making the cookies overly sweet or greasy.
What makes these cookies chewy?
Chewy cookies are the result of both the recipe and the baking method. I find that making larger cookies using a ¼-cup scoop creates the perfect contrast between crisp edges and soft, chewy centers. It’s also important not to overbake them. The cookies should still look slightly underdone in the center when they come out of the oven, as they will continue to set on the hot baking sheet.
How do I know when the cookies are done baking?
The cookies are done when the edges are lightly golden brown and the centers still look slightly pale and puffy. They may seem a little underdone at first, but they will continue to cook and set as they cool. This is what gives them their soft and chewy texture!
Preparing the Cookie Dough
In a large bowl, whisk together the flour, baking soda, and kosher salt until well combined. Set aside.

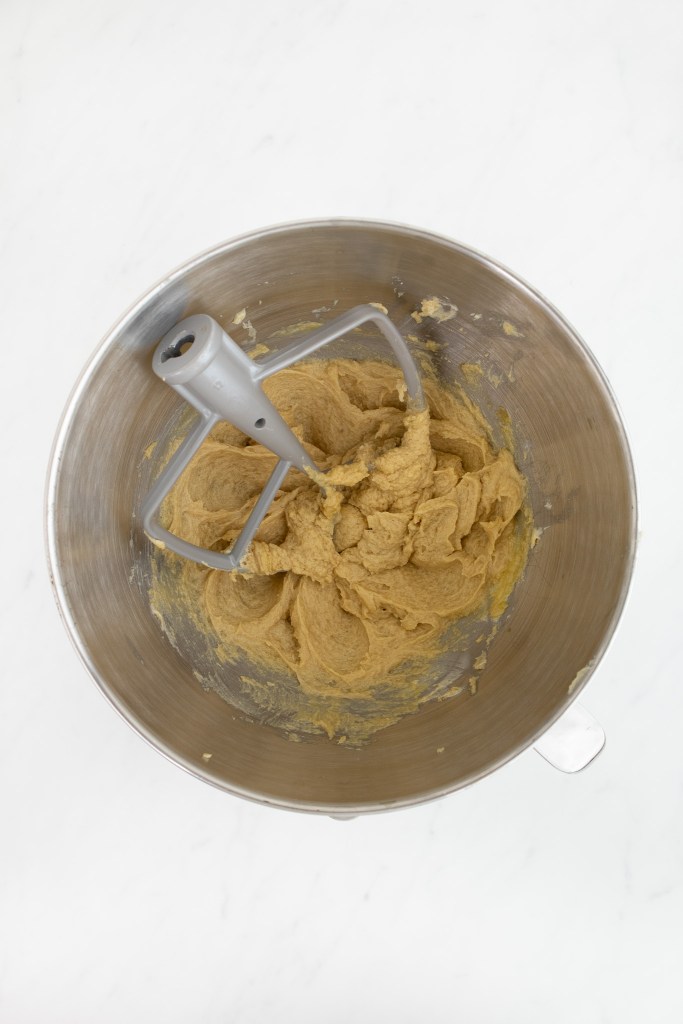
In the bowl of a stand mixer fitted with the paddle attachment, add in the butter, brown sugar, and granulated sugar, and mix on low speed until well combined, scraping down the sides of the bowl with a rubber spatula as necessary.
Pro tip: Despite what many recipes indicate, you do not need to mix until “light and fluffy”. Rather, you want to incorporate the least amount of air as possible into the cookie dough, so that the cookies do not become “cakey”.
With the mixer still on a low speed, add in the egg and egg yolk, followed by the vanilla, again just until well combined.
Next, add in the flour, half at a time until just a few streaks of flour remain.
Add in 1 cup of the white chocolate chunks (reserving the remaining ¼ cup to press into the tops of each cookie) and all the macadamia nuts. Fold them in with a rubber spatula just until evenly distributed. Cover and chill the dough in the refrigerator for 20 minutes.

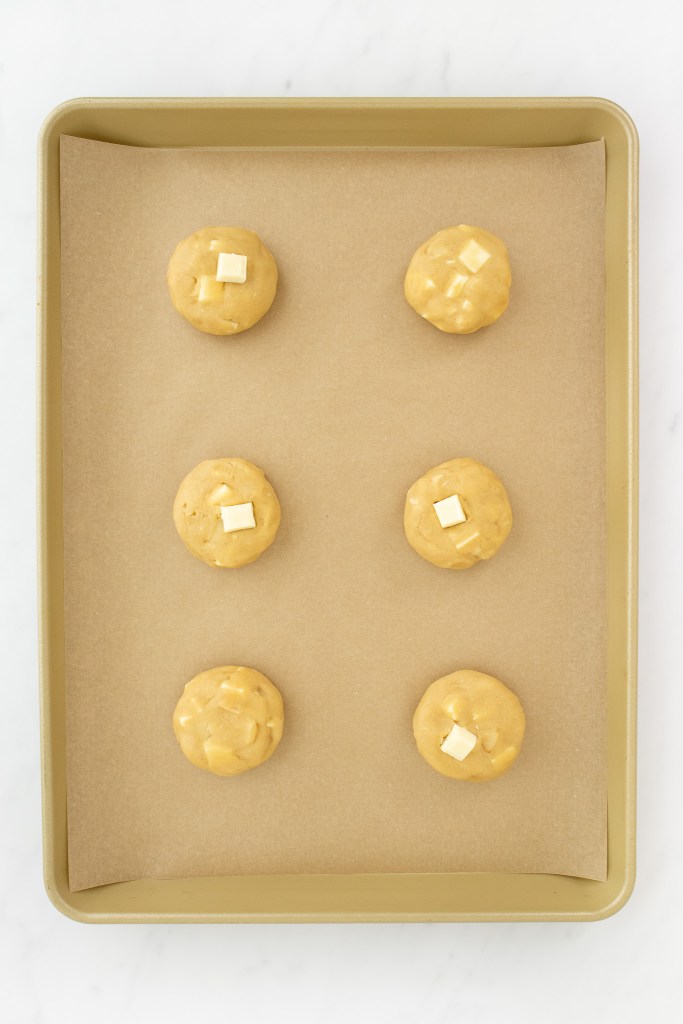
Remove the dough from the fridge and spoon it into ¼ cup mounds on a baking sheet lined with parchment paper (I use a ¼-cup measuring cup). Roll each mound in your hand to form a smooth ball, then press each ball down with the palm of your hand to form a puck shape. Place the remaining ¼ cup of chocolate chunks into the top of each cookie.
Note: You can place the dough pucks close together because they will be separated again before baking.

Cover the baking sheet with plastic wrap and chill the cookies in the fridge for at least 4 hours, but ideally overnight.
Pro tip: At this point, you can freeze the shaped cookies for later. Just freeze them on a backing sheet or large plate in a single layer for a few hours before transferring them to an airtight container.
Baking the Cookies
When ready to bake, preheat your oven to 325℉.
Place the cookies on a baking sheet lined with parchment paper, 2 to 3 inches apart. I recommend only baking 6 cookies at a time on a single baking sheet, as they will spread in the oven. However, if you have a second baking sheet, you can bake two batches at a time.
Bake the cookies in the center of the oven for 18 to 20 minutes, until golden brown around the edges and slightly pale in the centres (they will continue to bake once removed).
Note: If using two pans, bake one pan on the upper ⅓ of the oven and the other on the lower ⅓, swapping the pans halfway through.
Once done, remove the pan from the oven and gently bang the pan on the counter to deflate them. Cool on the pan for 5 minutes before transferring them to a wire rack to cool completely. Store the cookies in an airtight container lined with paper towel.

White Chocolate Macadamia Nut Cookies
Ingredients
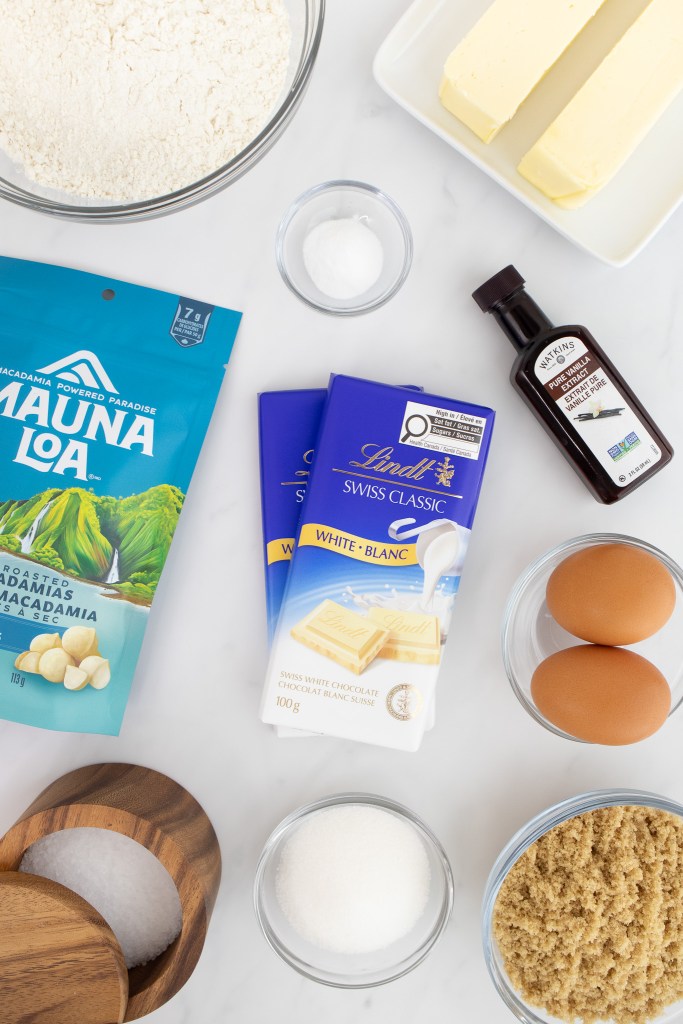
- 2 cups all-purpose flour (spooned and leveled)
- 1 tsp baking soda
- 1 ½ tsp kosher salt (I use Diamond Crystal; if using Morton or table salt, reduce to 1 tsp)
- 14 Tbsp (1 ¾ sticks) unsalted butter, at room temperature
- ¾ cup light brown sugar, tightly packed
- ¼ cup + 2 Tbsp granulated sugar
- 1 large egg, cold (from the fridge)
- 1 large egg yolk, cold (from the fridge)
- 2 tsp pure vanilla extract
- 1 cup (about 120g – 130g) macadamia nuts, dry roasted or toasted at home (see Note 1)
- 1 ¼ cup (200g) white chocolate, chopped into ¼" chunks, divided
Instructions
Preparing the Cookie Dough
- In a large bowl, whisk together the flour, baking soda, and salt until well combined. Set aside.2 cups all-purpose flour1 tsp baking soda1 ½ tsp kosher salt
- In the bowl of a stand mixer fitted with the paddle attachment, combine the butter, brown sugar, and granulated sugar. Mix on low speed just until well combined, scraping down the sides of the bowl with a rubber spatula as necessary.Pro tip: Despite what many recipes indicate, you do not need to mix until "light and fluffy". Rather, you want to incorporate the least amount of air as possible into the cookie dough so that the cookies do not become "cakey".14 Tbsp (1 ¾ sticks) unsalted butter, at room temperature¾ cup light brown sugar, tightly packed¼ cup + 2 Tbsp granulated sugar
- With the mixer still on a low speed, add in the cold egg and egg yolk, followed by the vanilla. Continue to mix, again just until well combined.1 large egg, cold (from the fridge)1 large egg yolk, cold (from the fridge)2 tsp pure vanilla extract
- Add the dry flour mixture to the wet ingredients, half at a time. Continue to mix on low until just a few streaks of flour remain.
- Using a rubber spatula, fold in 1 cup of the white chocolate chunks (reserving the remaining ¼ cup) and all of the macadamia nuts just until evenly distributed. Cover the bowl with plastic wrap and chill the dough in the refrigerator for 20 minutes.1 cup (about 120g – 130g) macadamia nuts, dry roasted or toasted at home
- Remove the dough from the refrigerator. Using a ¼-cup measuring cup or scoop, portion the dough into 15 equal mounds and set each on a baking sheet lined with parchment paper. Roll each mound between your hands to form a smooth ball, then gently press down with the palm of your hand to form a thick puck shape. Distribute the reserved ¼ cup of white chocolate chunks across the tops of the cookie pucks to fill in any gaps.Note: The cookie dough pucks can be placed close together during this stage, as they will be spaced apart later before baking.
- Cover the baking sheet with plastic wrap and chill the cookies in the refrigerator for at least 4 hours, but ideally overnight.Pro tip: At this point, you can also freeze the shaped cookies for later. Simply freeze them on a baking sheet or large plate in a single layer for a few hours, then transfer them to an airtight container.
Baking the Cookies
- Preheat the oven to 325℉.
- Place the cookies on a fresh baking sheet lined with parchment paper, spacing them 2" to 3" apart.Note: I recommend only baking 6 cookies at a time on a single baking sheet, as they will spread in the oven. If you have a second baking sheet, you can bake two pans at a time.
- Bake in the center of the oven until the edges are golden brown and the centers are still slightly pale (about 18 to 20 minutes). They will continue to bake on the pan once removed.Note: If baking two sheets at once, place on the upper and lower thirds of the oven and swap their positions halfway through.
- Remove from the oven and gently bang the baking sheet on the counter to deflate the cookies. Allow them to cool on the pan for 5 minutes, then transfer them to a wire rack to cool completely.
- Store cooled cookies in an airtight container lined with paper towel.
Notes
- Macadamia Nuts: This recipe works best with dry-roasted, unsalted macadamia nuts. If using raw nuts, toast them in a 350°F oven for 5 to 8 minutes, then let them cool completely before adding them to the dough.