Outside of Europe, it can be hard to find a good store-bought fruit tart. Though beautiful, they are often stale and taste like they have been sitting in a pastry case for far too long. The thought of making your own fruit tarts can seem intimidating… but, trust me, they are so much more delicious and also incredibly rewarding.
Whether you make one big tart using a classic tart pan (with a removable bottom) or smaller individual tarts (using perforated tart rings that the “pros” use), homemade fruit tarts are little works of art that are sure to impress!
TRADITIONAL SWEET TART CRUST (PÂTE SUCRÉE)
A tart crust is different from a pie crust both in taste and texture. Tart crusts (for sweet tarts) are typically sweeter, finer in texture, and aren’t as flaky. Traditionally, there are two methods of making a sweet tart dough.
The first method is the creaming or “crémage” method, where you start by creaming together sugar and room-temperature butter — essentially making a cookie dough — which is then baked into the shape of a tart shell.
The second method is called the “sablage” method, where cold butter is worked into the flour until it becomes “sandy” (similar to a pie dough, but without any chunks of butter).
This recipe uses the sablage method, which seems to be favored by traditional French pastry chefs.
I’ve tested both methods, and I just love the delicate texture that the sablage method gives to tart crusts!
MAKING FRUIT TARTS WITH A TART PAN VS. PERFORATED TART RINGS
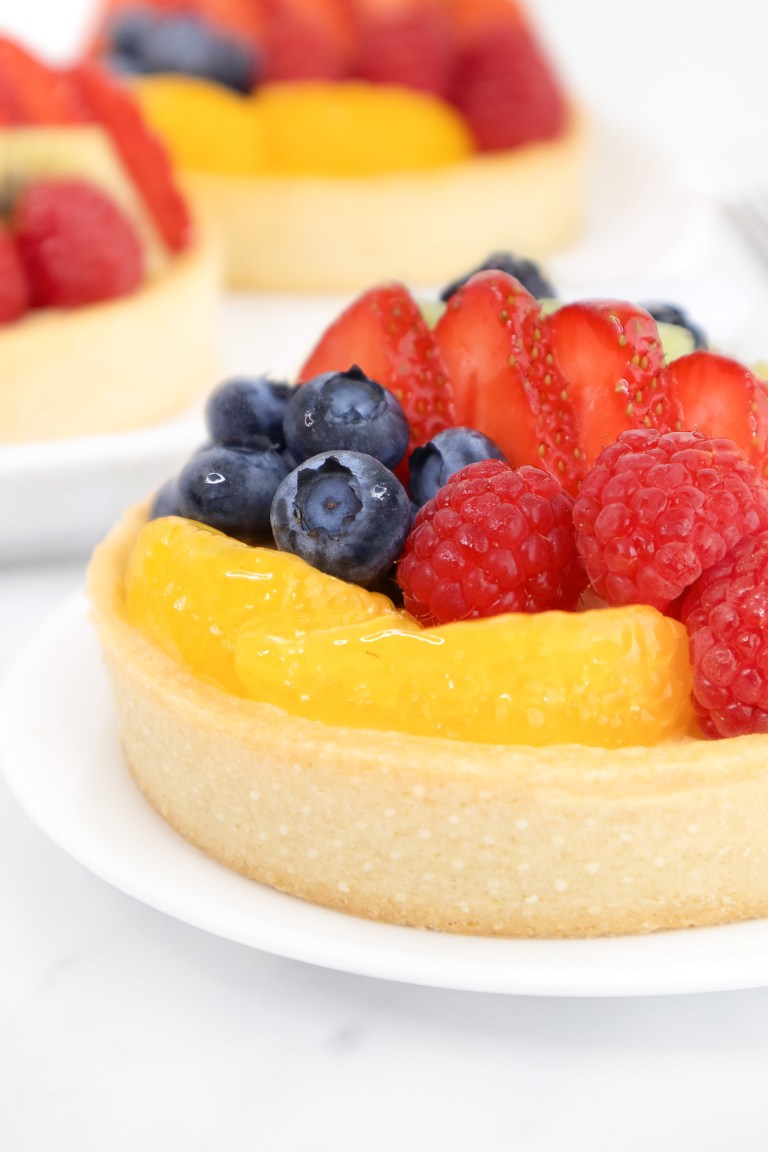
This recipe makes one 9” tart (or as large as a 10.5” tart) — using a traditional tart pan with a removable bottom — or four 4” tarts using perforated tart rings. Yes, it is a bit more work to use tart rings, but I just love how professional they look. They are also great to serve as individual desserts at a dinner party or special occasion.
Nevertheless, this recipe covers how to form and bake both kinds/sizes.
HOW TO MAKE THE PERFECT PASTRY CREAM
Pastry cream is another classic component of many French desserts. It is a creamy custard filling that is so versatile and tastes so much better when it’s homemade. Pastry cream is actually very simple to make and is a great addition to your baking repertoire.
I’ve found that the only trouble I’ve encountered with pastry cream is undercooking it! I know there is a fear when making custard that the eggs may overcook and curdle; however, egg yolks actually contain an enzyme called “amylase”, which, if not cooked long enough, will break down the starch molecules in pastry cream and cause it to become runny once cooled.
The best way to avoid this is to cook the pastry cream — whisking constantly, of course — until it thickens and begins to bubble, then for another 1 to 2 minutes more to ensure it is properly cooked.
USING APRICOT GLAZE ON FRUIT TARTS
Apricot glaze is what gives fruit tarts — and many other classic French desserts — that characteristic (and very professional-looking) shine. It not only makes the tarts glisten so beautifully, but also helps prevent the fruit from drying out and gives an added depth of flavor.
PREPARING THE TART CRUST (PÂTE SUCRÉE)
In the bowl of a stand mixer, whisk together the all-purpose flour, almond flour, salt, and powdered sugar. Place the entire bowl in the freezer for 5 minutes to chill.
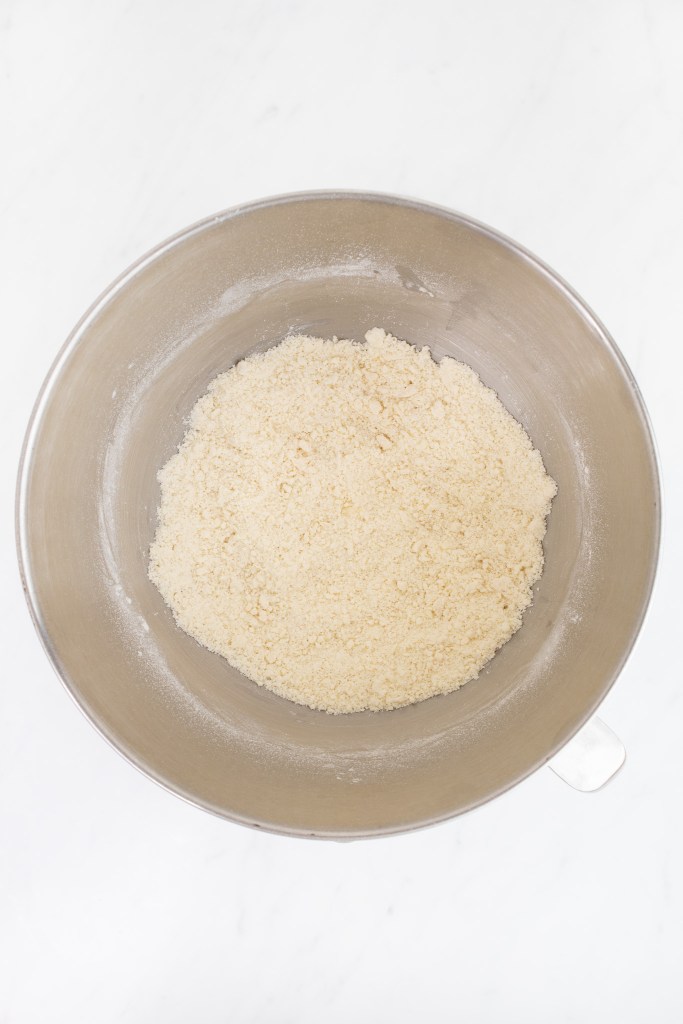
After 5 minutes, add in the cubes of very cold butter and mix on low (I use speed #3 setting on my mixer) for 10 to 12 minutes, until the flour/butter mixture is the texture of a fine cornmeal or almond meal.
In the meantime, whisk the egg yolk in a small bowl, and add in the water, vanilla extract, and almond extract. Stir to combine, then return the liquid mixture to the fridge to chill while you wait for the flour and butter to mix.
When the flour/butter mixture is finished, slowly drizzle in the liquid mixture (with the mixer still on a low speed). Mix just until the dough comes together and no dry spots remain.

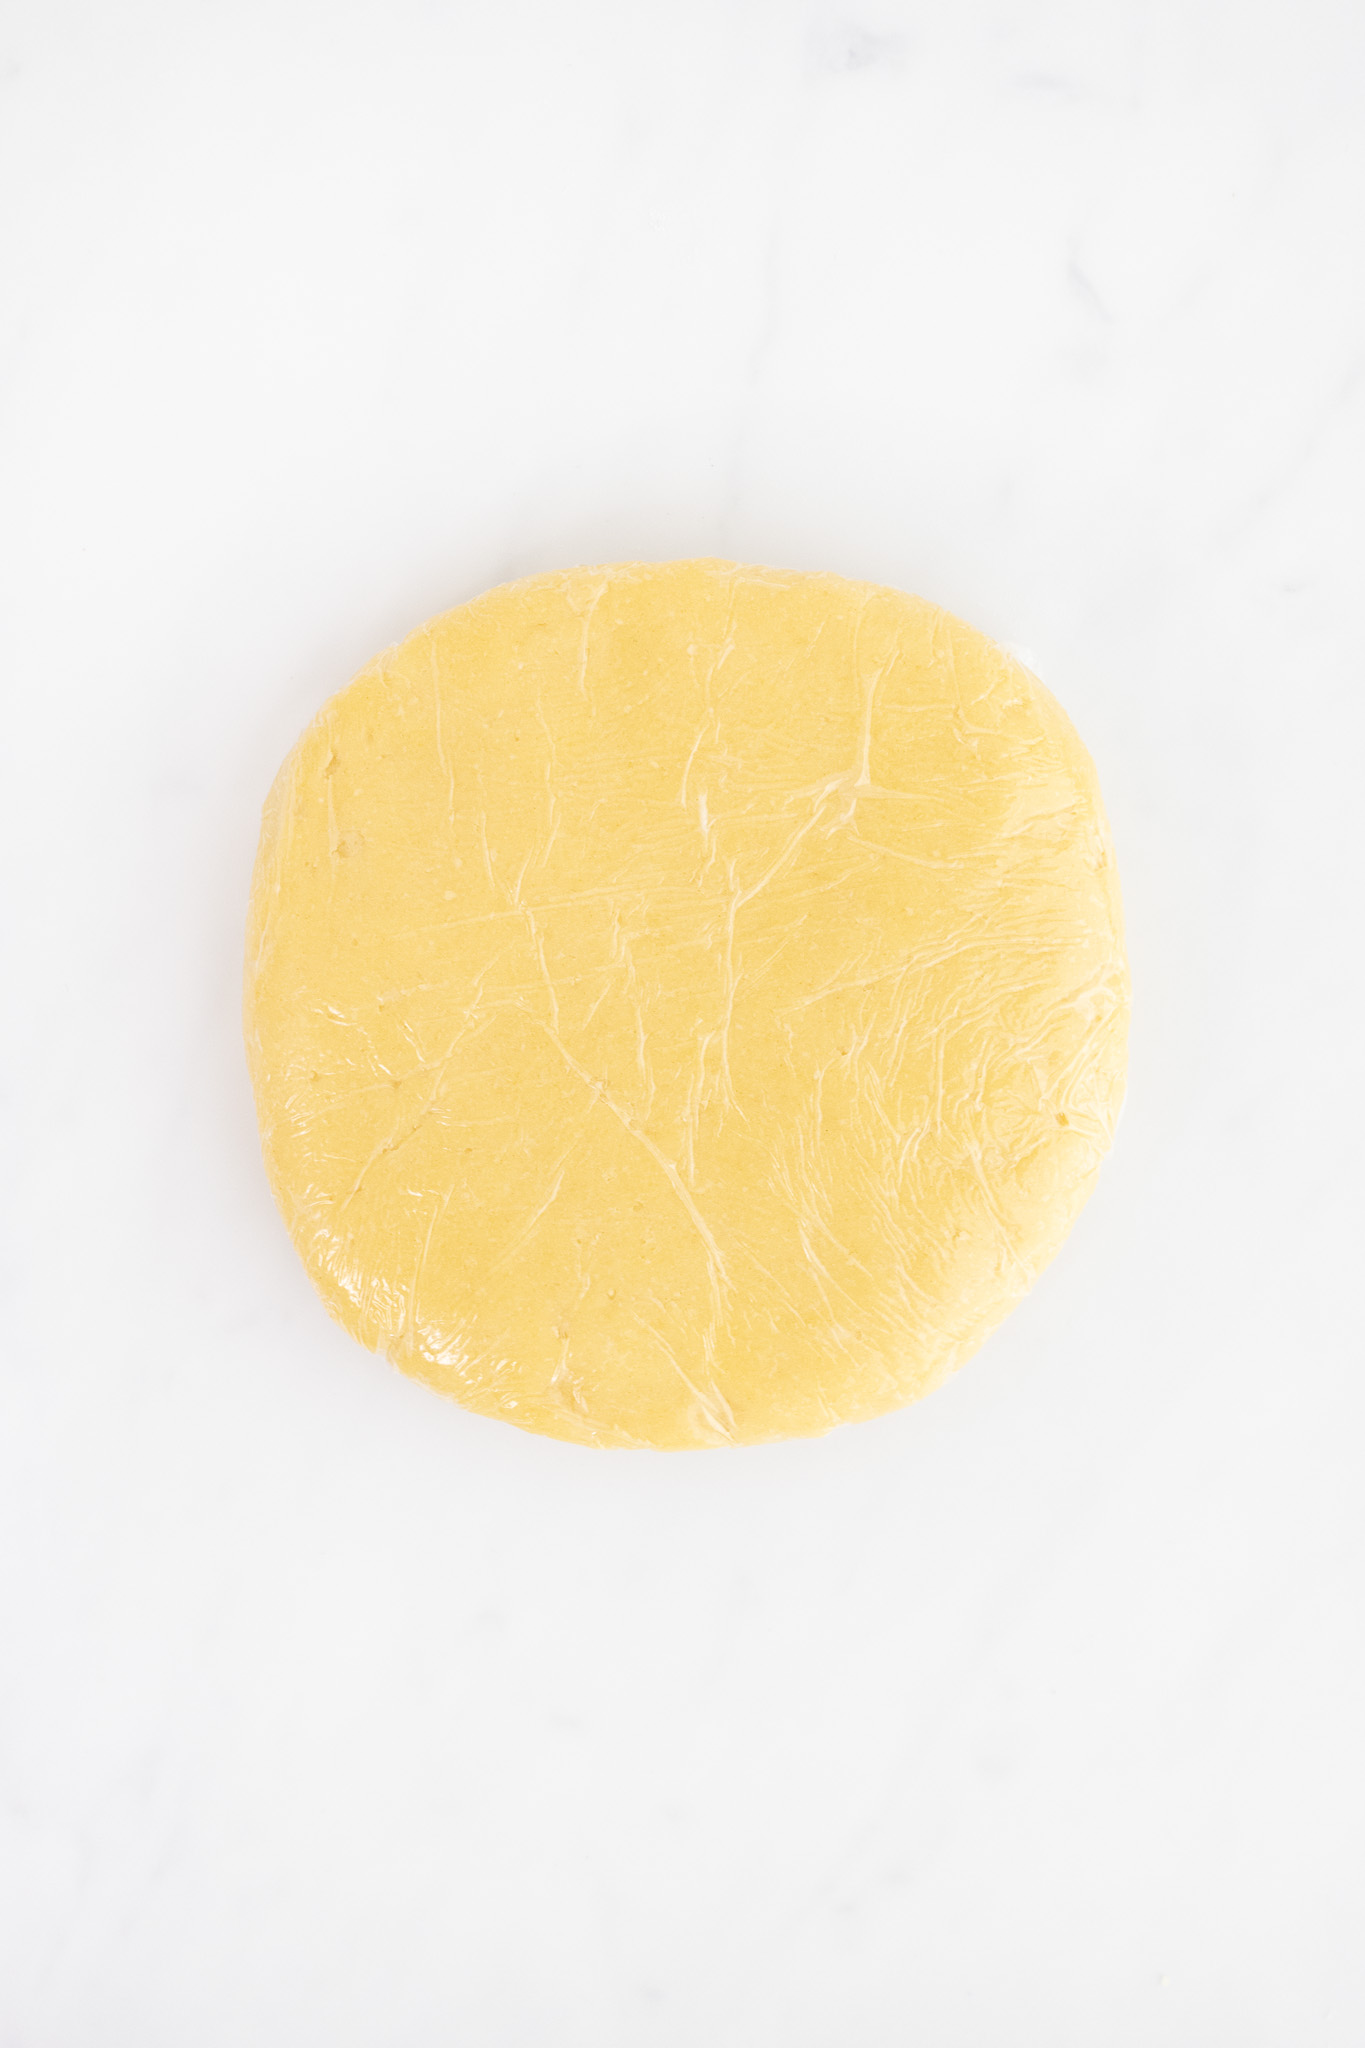
Pick the dough up with your hands and form it into a smooth ball. You can knead it 2 or 3 times, if necessary, but try not to overwork the dough.
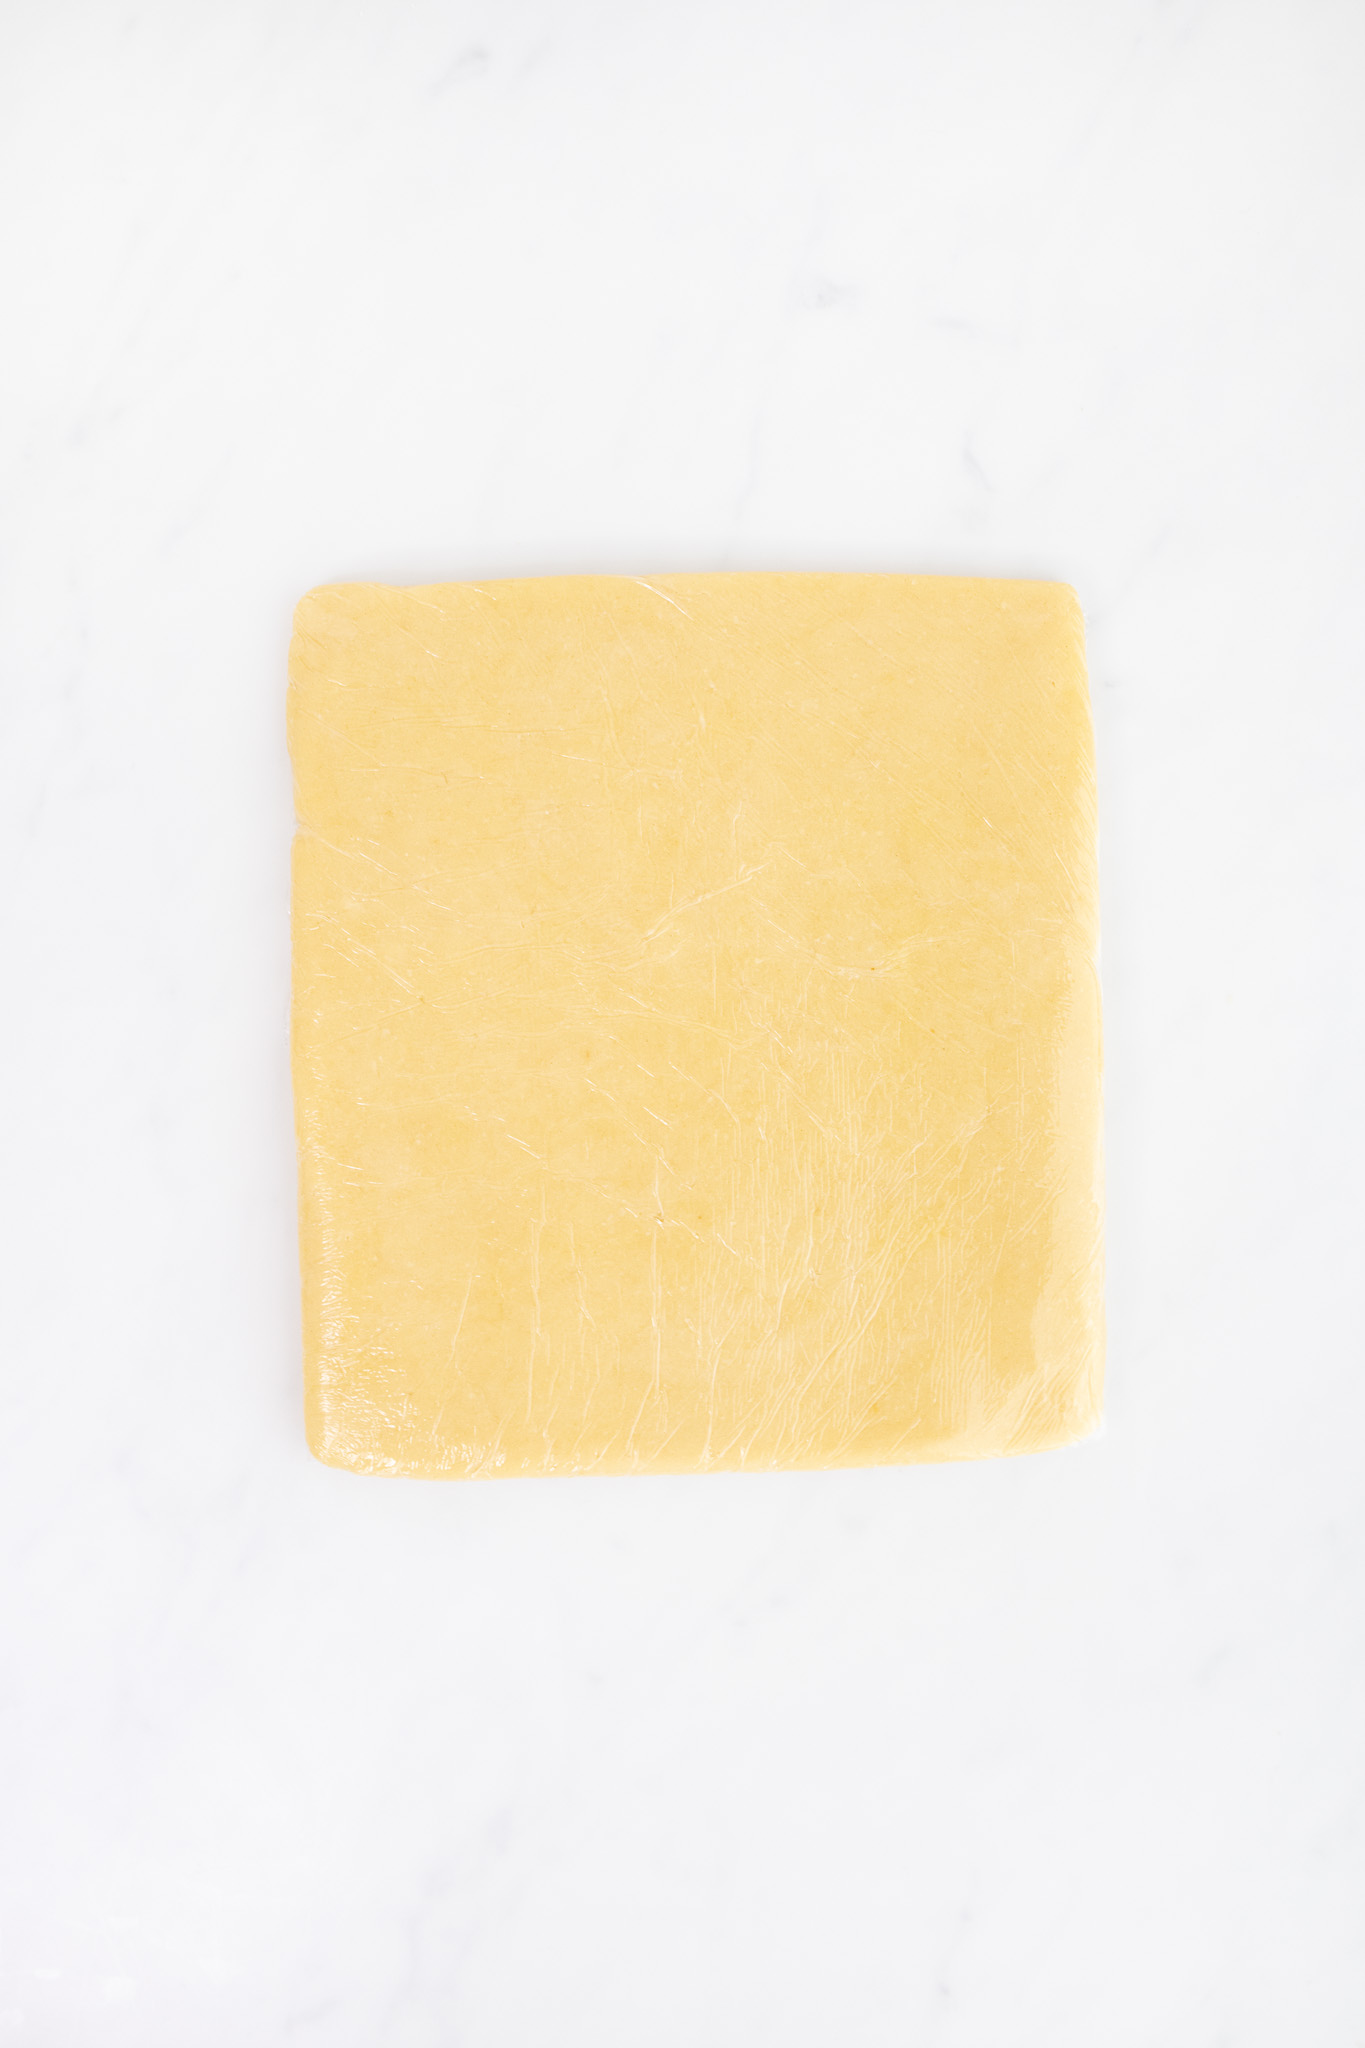
If you’re making one large tart, form the dough into a flat disk. If you are making smaller tarts using tart rings, form the dough into a rectangular shape (which will make it easier to cut into sections). In either case, wrap the dough in plastic wrap and allow it to chill in the fridge for 1 hour.
After an hour, remove the dough from the fridge and allow it to sit at room temperature for 5 to 10 minutes. You want the dough to warm up just enough to be pliable so that it doesn’t crack when rolling it out.
FORMING & BAKING ONE 9″ TART (USING A TART PAN)
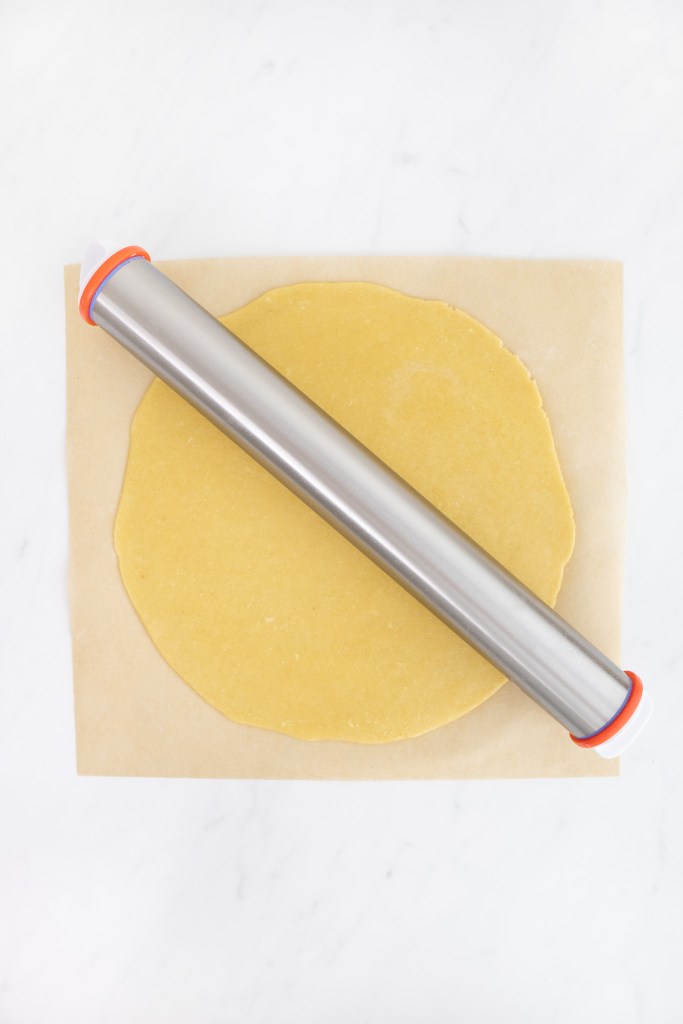
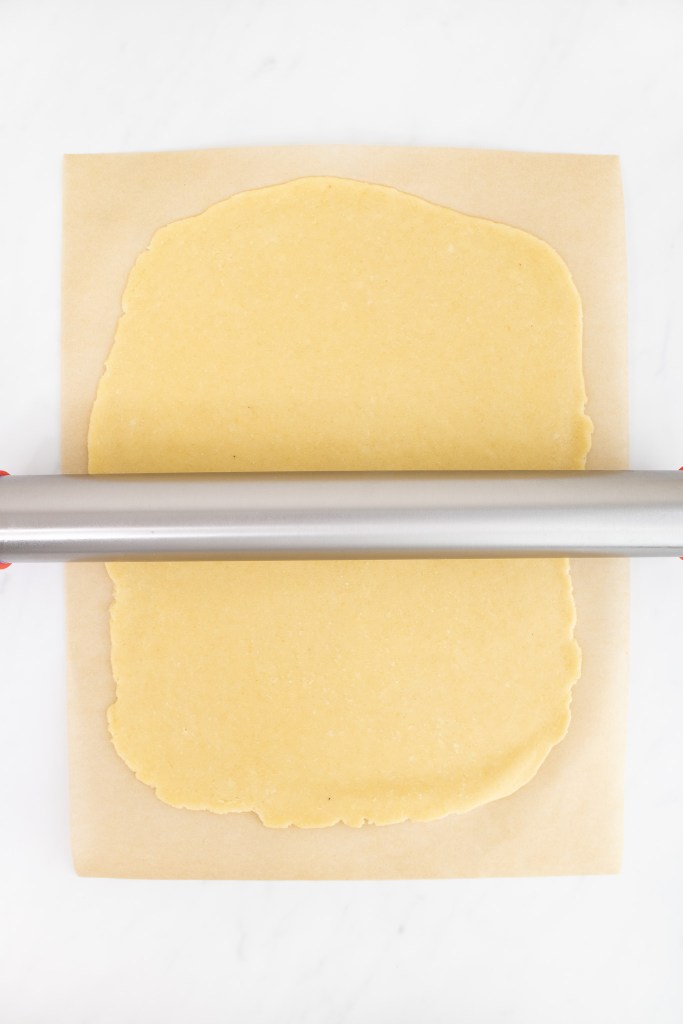
On a lightly floured piece of parchment paper, roll the dough out into a circle that is about ⅛” thick. I recommend using a rolling pin that has adjustable stoppers to help ensure the dough is an even thickness.
Carefully turn the parchment paper upside down over top of your tart pan and remove the parchment paper from the dough.
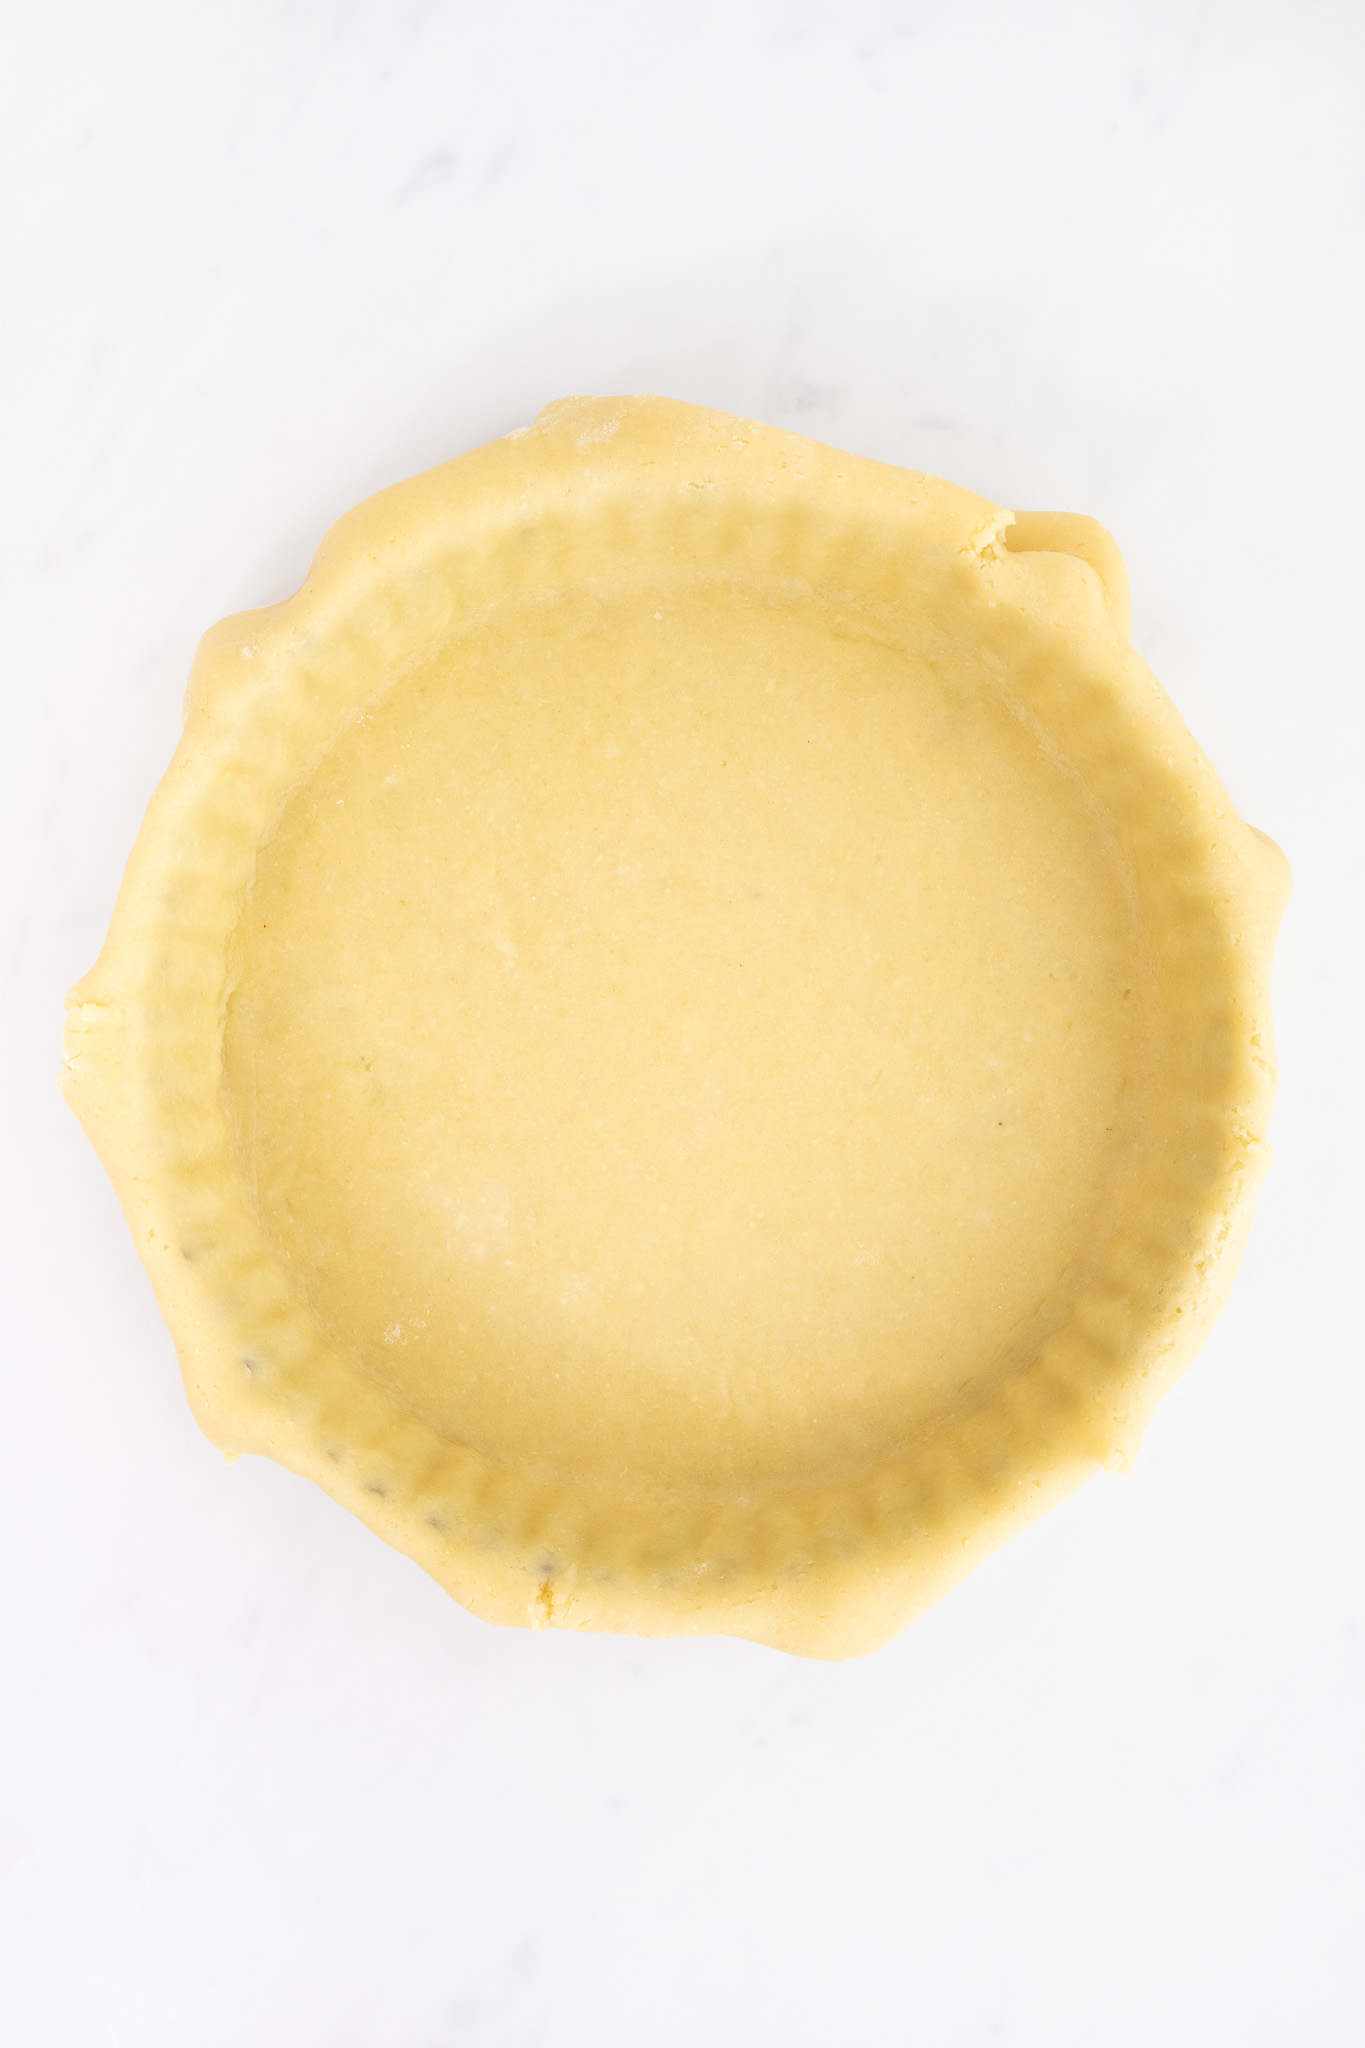
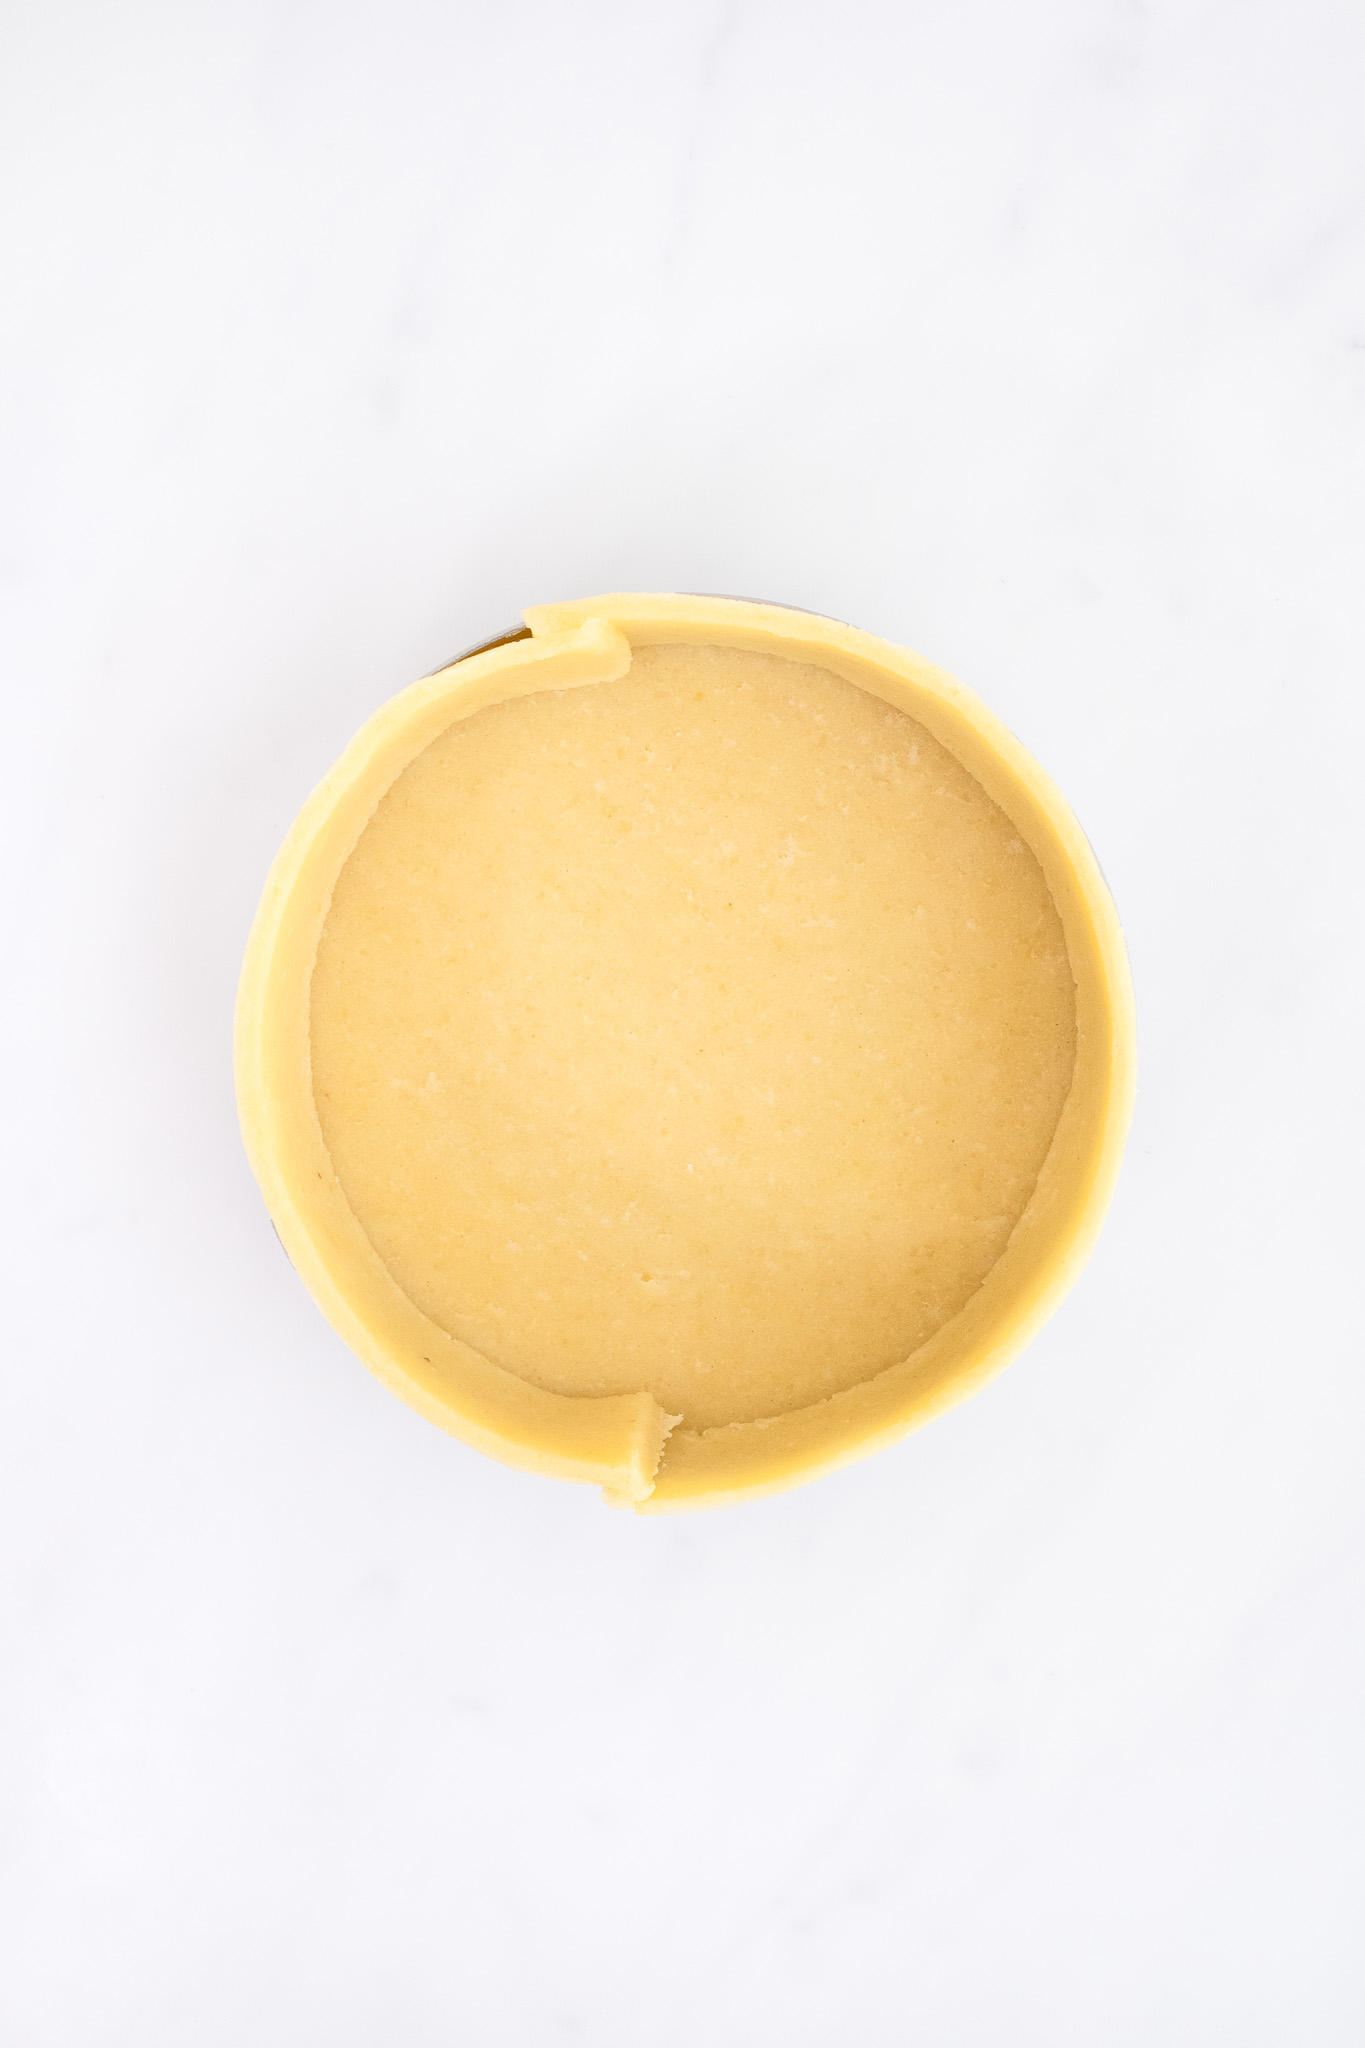
Allow the dough to fall into the tart pan, gently pressing it into the bottom edges and sides of the pan, being careful not to stretch the dough. Using your thumb, press the dough firmly into the sides of the pan, making sure it is uniform in thickness all the way around.
Using your rolling pin, roll the pin over the top edges of your tart pan to trim off any excess dough.

Place the tart pan in the freezer for 30 minutes to allow the dough to chill and firm up.

During this time, preheat your oven to 350℉.
After 30 minutes in the freezer, remove the tart pan and place it on a baking sheet. Press a piece of aluminum foil into the bottom edges and sides of the dough and fill the foil with pie weights, dried beans, or rice.
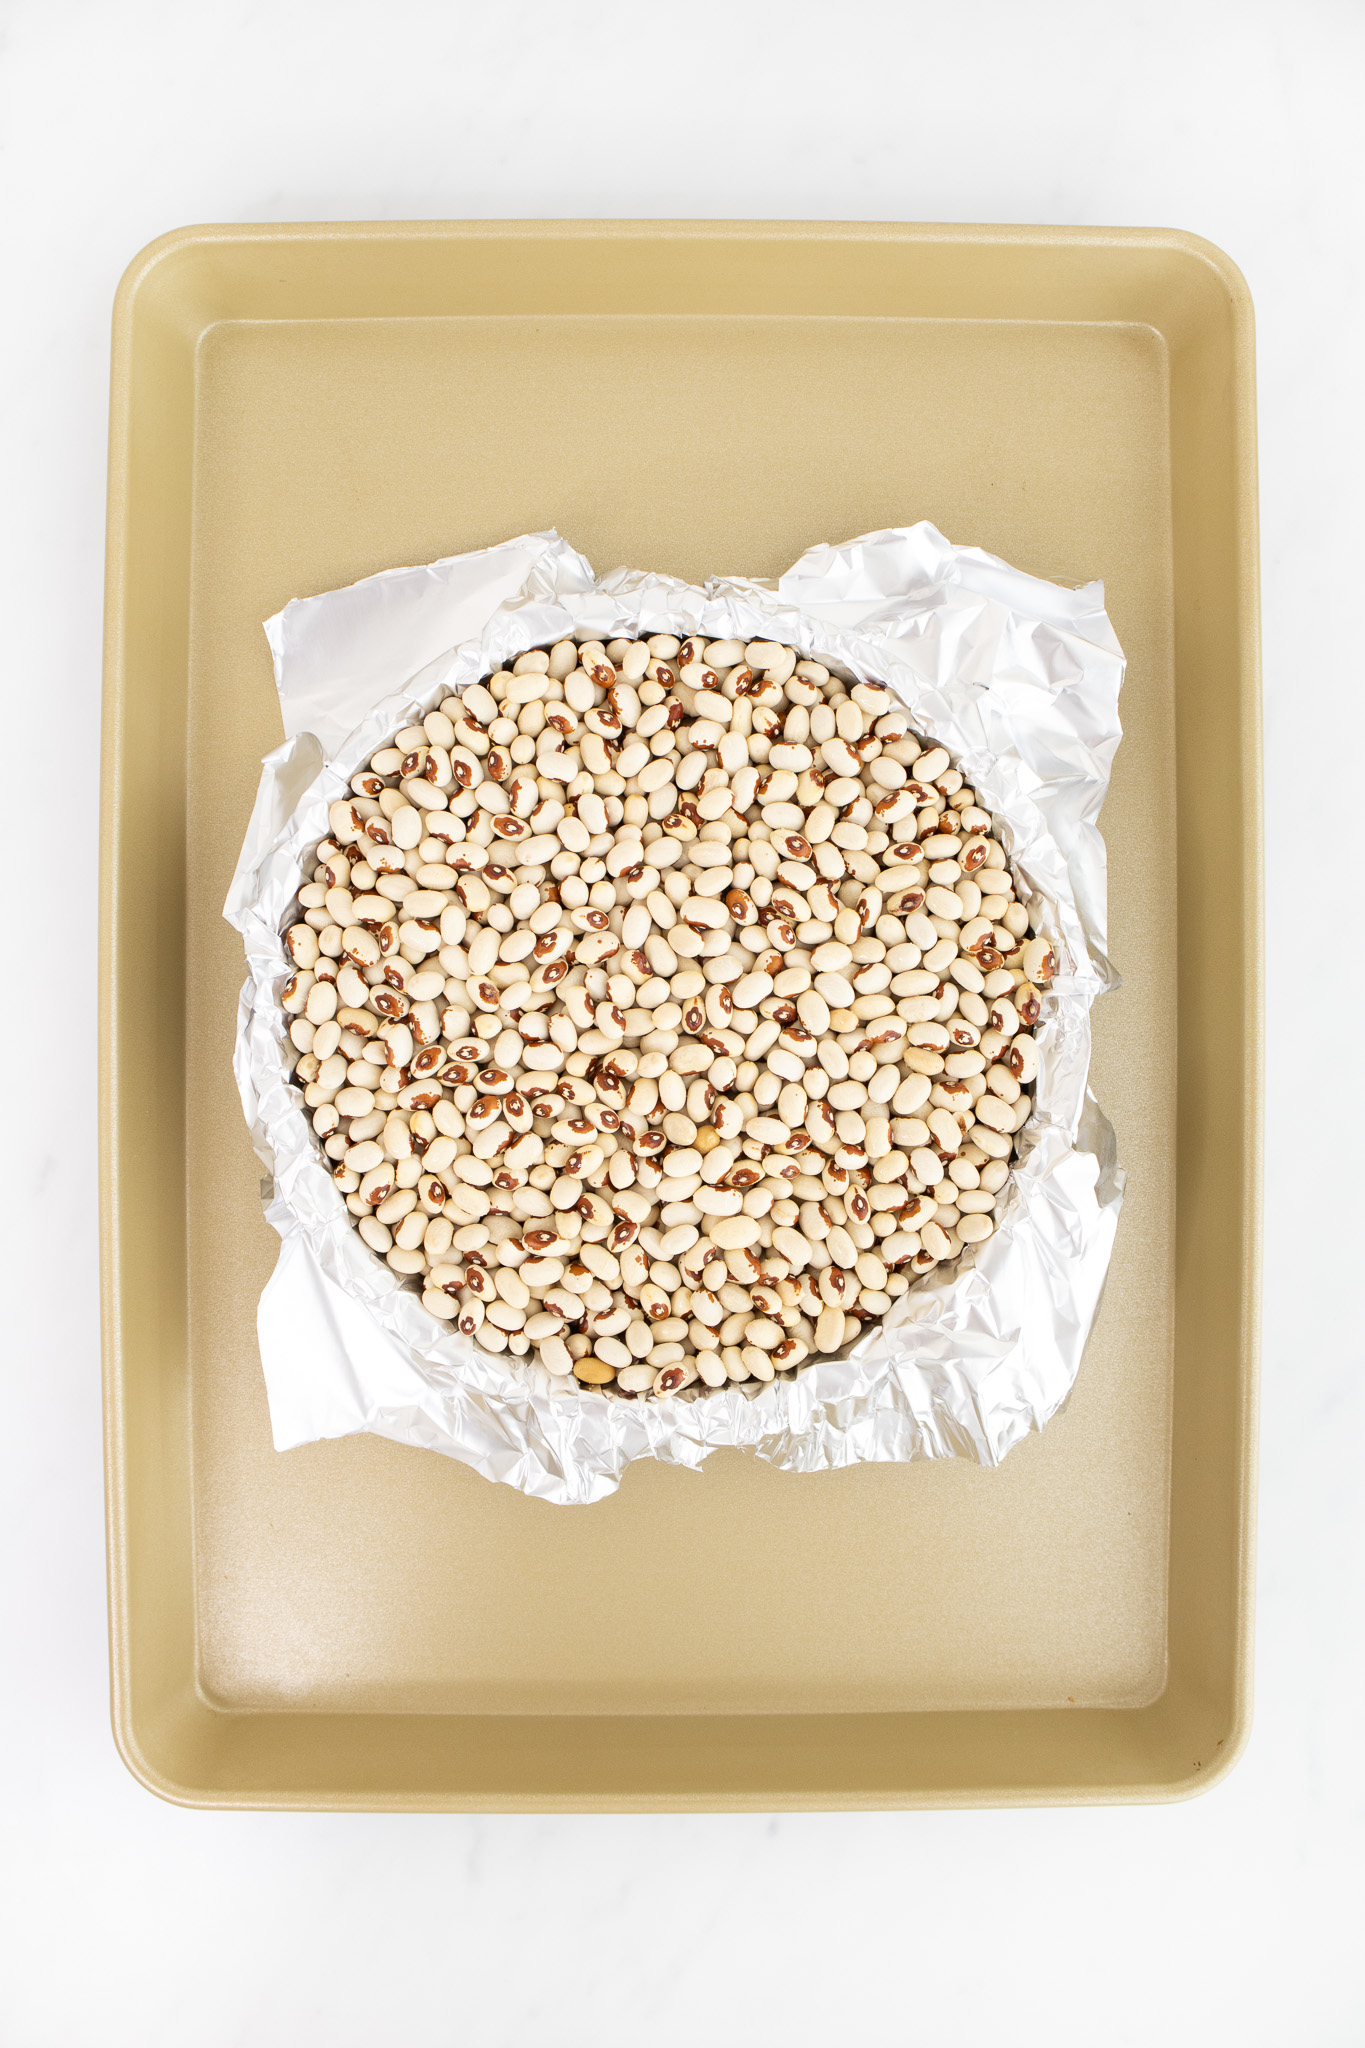
Place the pan into the center of the oven and blind bake it for 20 minutes.
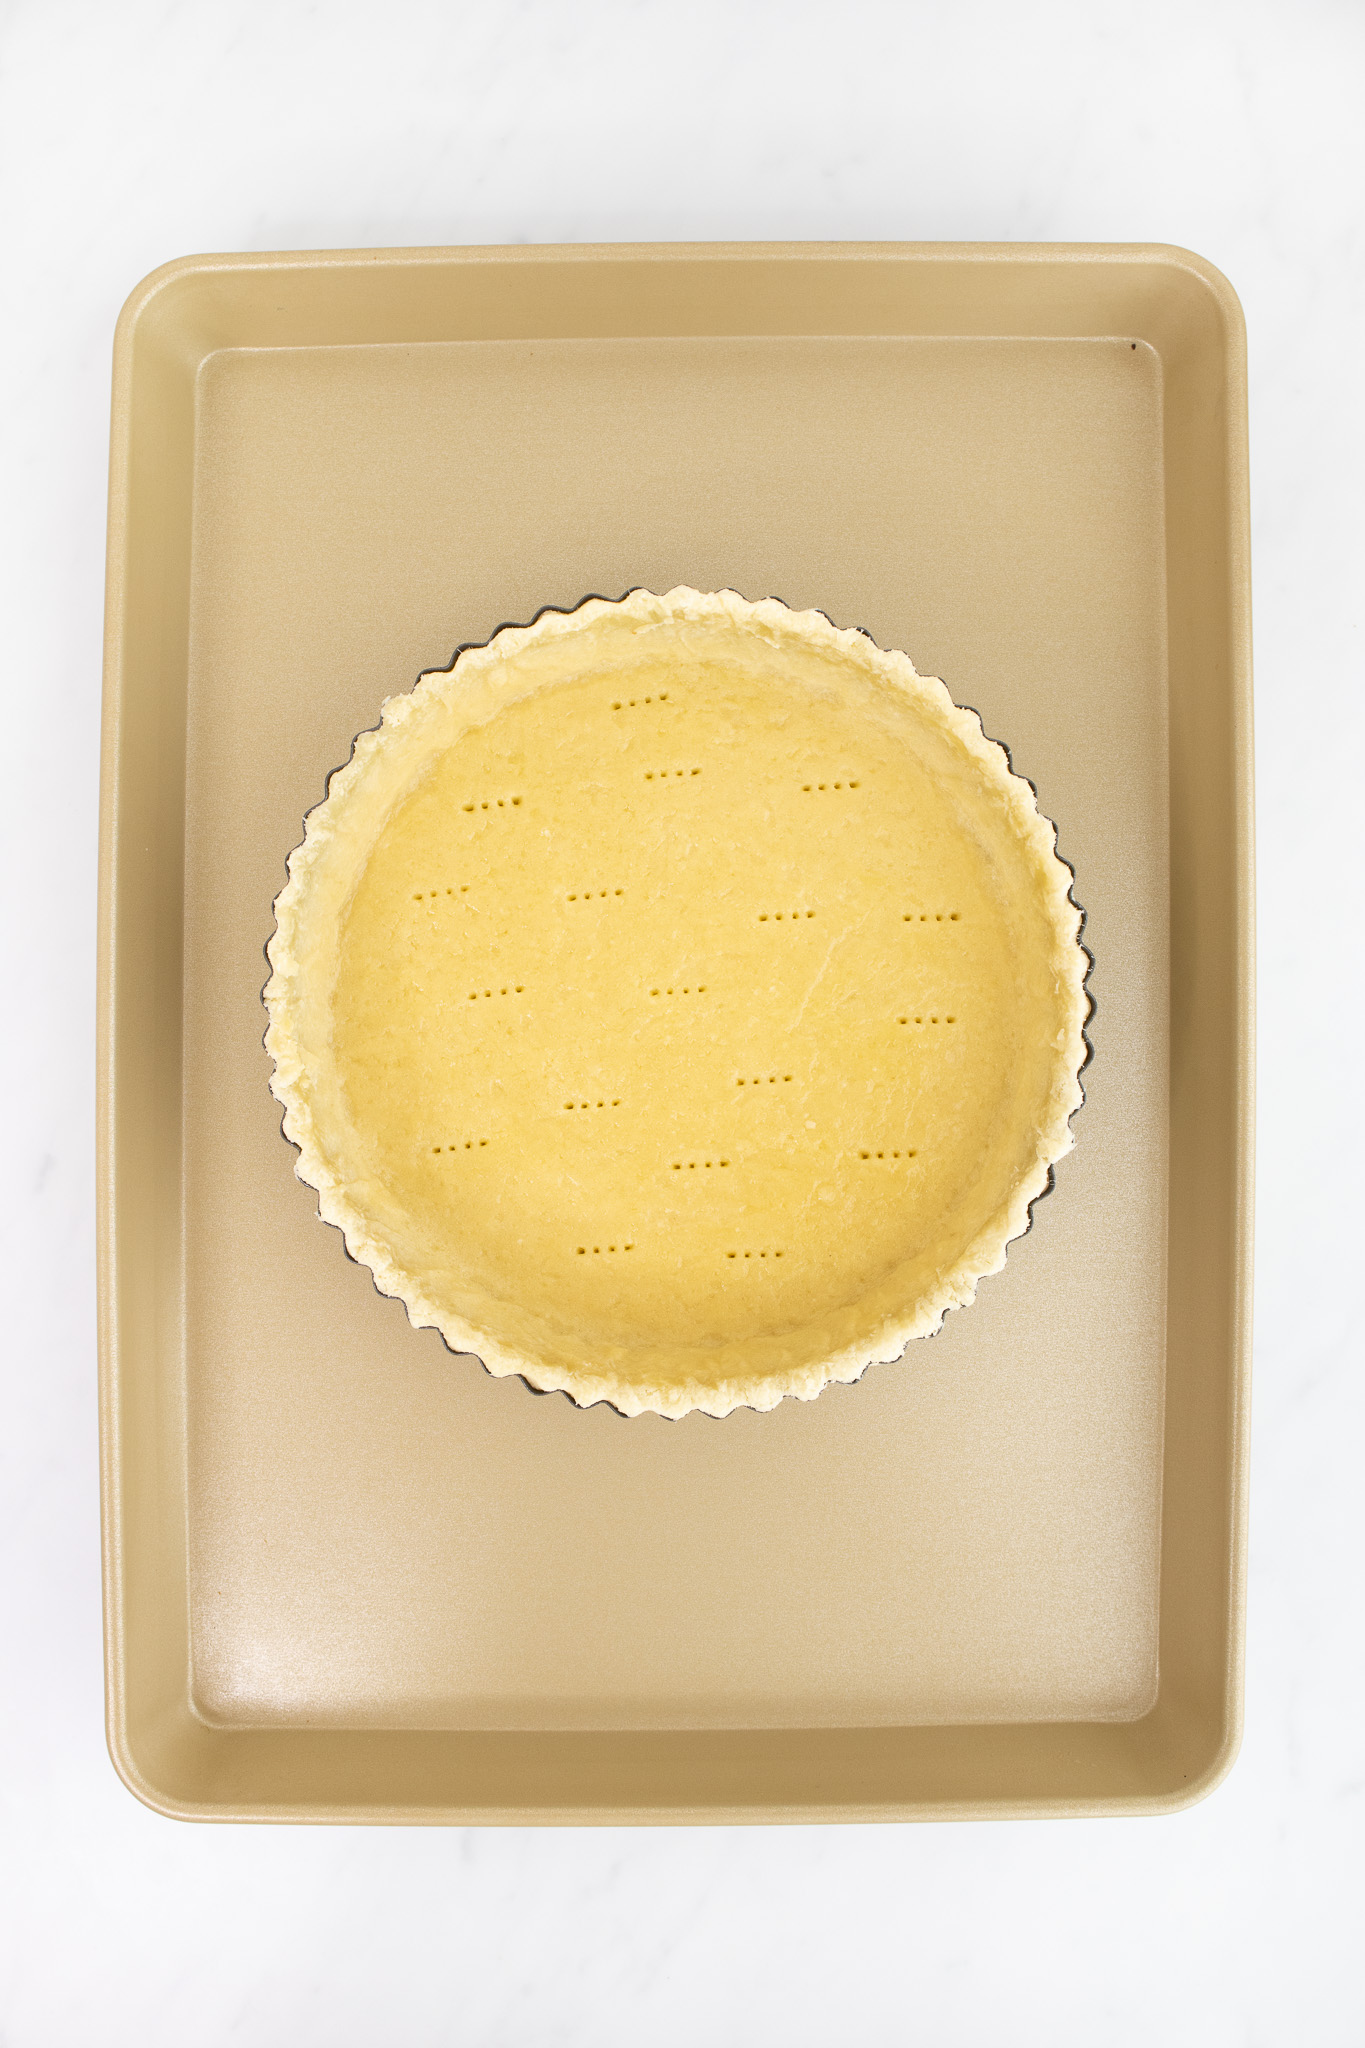
After 20 minutes, remove the foil and pie weights, prick the bottom of the tart with the tines of a fork, and place it back into the oven for another 10 to 15 minutes, or until nice and golden brown (depending on the size of your pan and thickness of your dough).
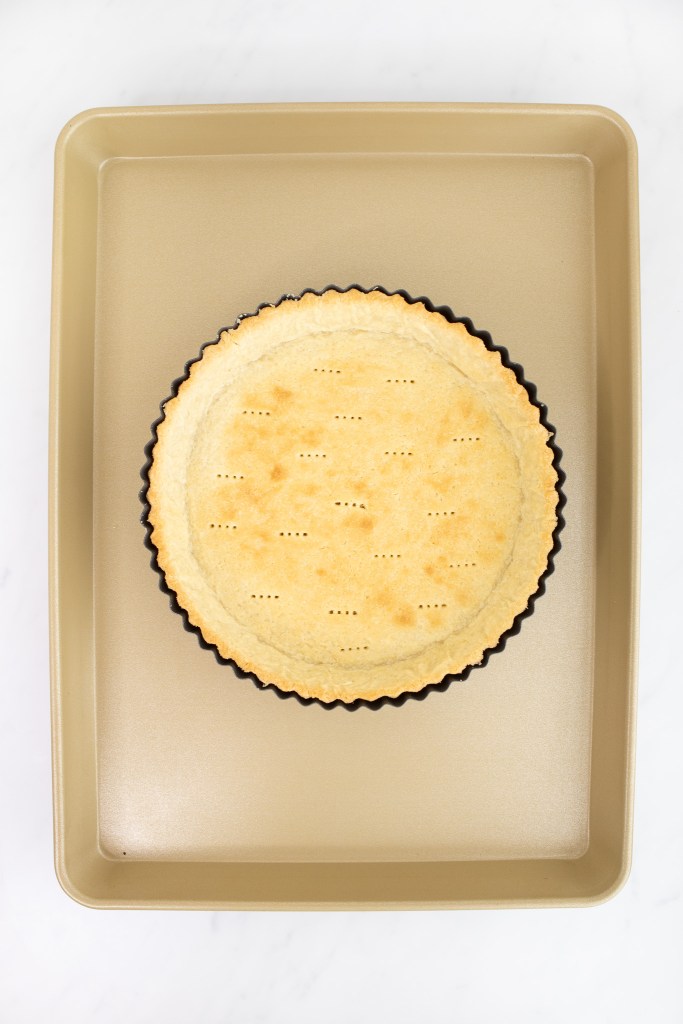
Remove the tart crust from the oven and place your tart crust (still in the tart pan) on a wire rack, and allow the crust to cool completely.
FORMING & BAKING FOUR 4″ SMALL TART (USING PERFORATED TART RINGS)
Before beginning, I recommend cutting the dough in half and rolling out each half on separate pieces of floured parchment paper. This will allow you to work with half of the dough at a time while the other half chills in the fridge.
Roll out one half of the dough into a rectangle about ⅛” thick. I recommend using a rolling pin that has adjustable stoppers to help ensure the dough is an even thickness.
Place the dough (still on the parchment paper) on a cutting board or baking sheet and back into the fridge for about 10 minutes to chill and firm up slightly. In the meantime, you can roll out the second piece of dough. Keep alternating between the two doughs to keep each half chilled.
For the bottom edge of each tart shell, cut out the bottom piece of dough using a perforated tart ring, as you would a cookie cutter. Ideally, the dough should be firm enough to stick to the inside of the perforated ring (but, if it doesn’t, that’s okay). Set the tart rings onto a plate covered with parchment paper and press the bottom piece of dough gently into the bottom edge of the tart ring.
Pro tip: If at any time you need to start over, just form the dough back into a ball in your hands, re-roll it out on your parchment paper to ⅛” thickness, and return it to the fridge or freezer to chill for a few minutes before continuing.
For the sides of your tart, cut out strips of dough that are each about 1″ wide. The dough should be chilled and firm enough to work with, but not so much that the dough cracks.
Place the strips around the inner edge of each tart ring and press them in firmly to the sides of the tart ring. You can use multiple strips around the circumference of each ring, just be shore to firmly join the edges together. Using your fingers, press the side pieces of dough into the bottom piece so that they are fused together firmly.

Using a paring knife, trim the edge of each tart shell so that the sides are flush with the top of each ring. If your dough has gotten too warm and isn’t cutting cleanly, you can place the whole tart shell in the freezer and trim them later.

Place the tarts into the freezer (on a plate covered with parchment paper so they won’t stick!) for 30 minutes.
In the meantime, preheat your oven to 350℉.
Place the tarts on a baking sheet lined with a perforated baking mat or piece of parchment paper and bake them in the center of the oven for 15 to 20 minutes (depending on the size of your tart molds and the thickness of your dough). They should shrink slightly away from the edges of the perforated tart ring and be lightly golden brown.
Allow them to cool completely on the baking sheet.


PREPARING THE PASTRY CREAM (CRÈME PÂTISSIÈRE)
In a large bowl, whisk together the granulated sugar and cornstarch. This will help prevent the cornstarch from forming any lumps.
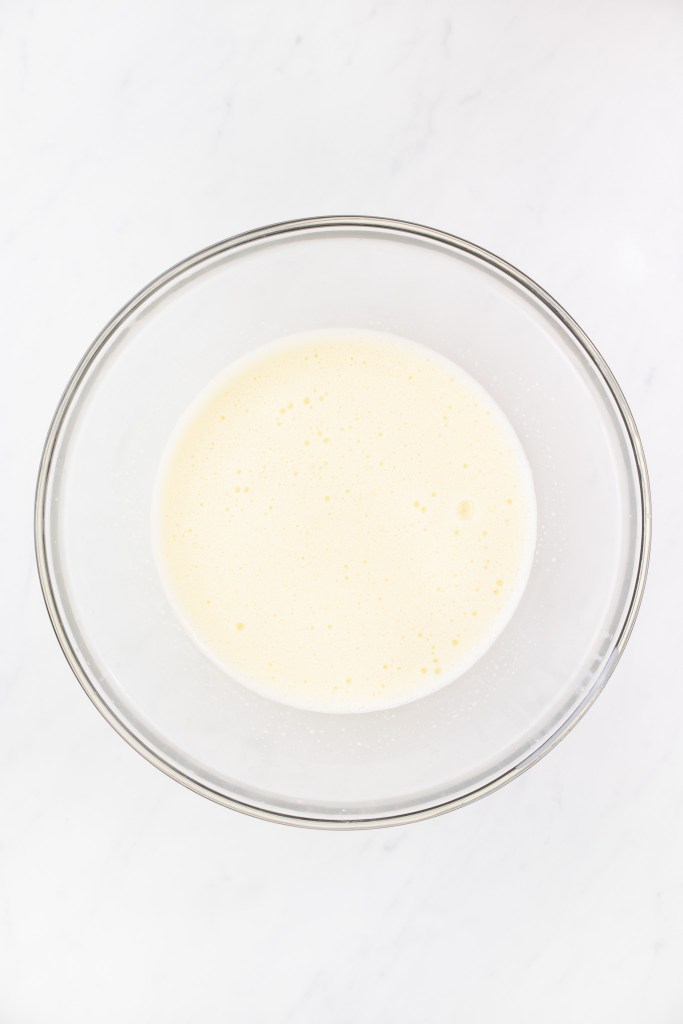
Add in the egg yolks, and whisk until the mixture is pale yellow in color and forms a slowly dissolving ribbon on the surface when the mixture drips from the whisk.


In a heavy-bottomed saucepan, add in milk and salt and heat the milk gently until it just begins to bubble.
Whisking constantly, pour the hot milk into the egg yolk mixture, beginning with just small dribbles (so that you don’t cook the eggs) and continuing with a small, but steady stream, until all of the milk is incorporated.
Pro tip: I recommend placing the bowl with the egg yolk mixture on a kitchen towel so the bowl won’t slide around while you are whisking.
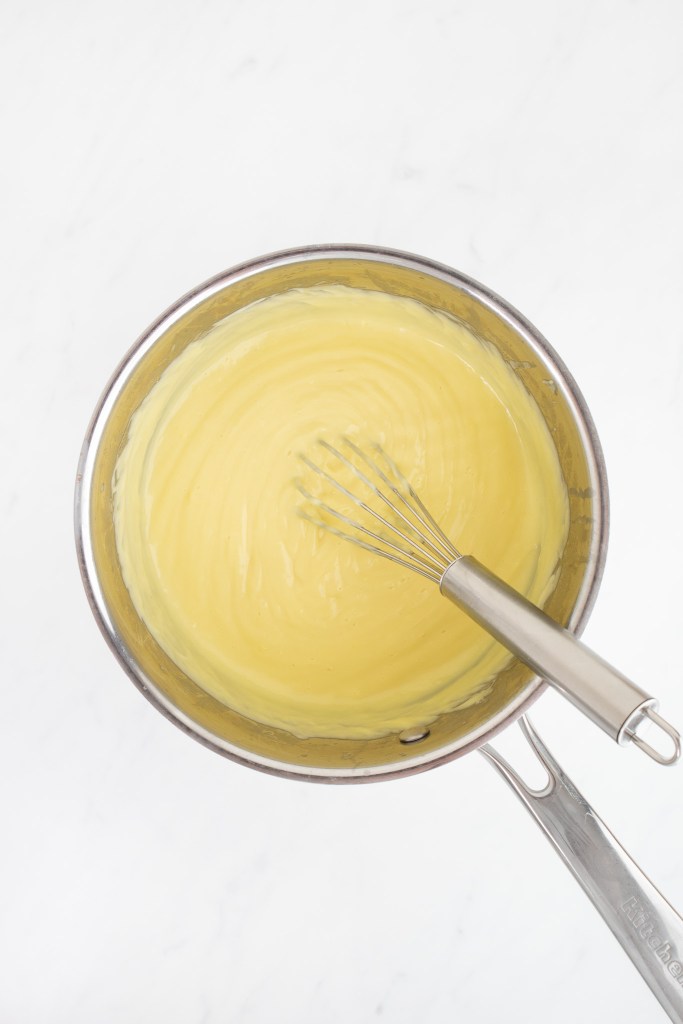
Once all of the hot milk has been added to the egg yolk mixture, pour the mixture back into your saucepan, and return it to medium heat. Continue to whisk constantly until your pastry cream gets thick and bubbly.
Pro tip: It is important that pastry cream be heated enough to activate the cornstarch or else it will become runny once it cools. I recommend heating it until it begins to bubble and then for another 1 to 2 minutes, whisking constantly.
Remove the mixture from the heat and whisk in the butter and vanilla, until all of the butter has incorporated.
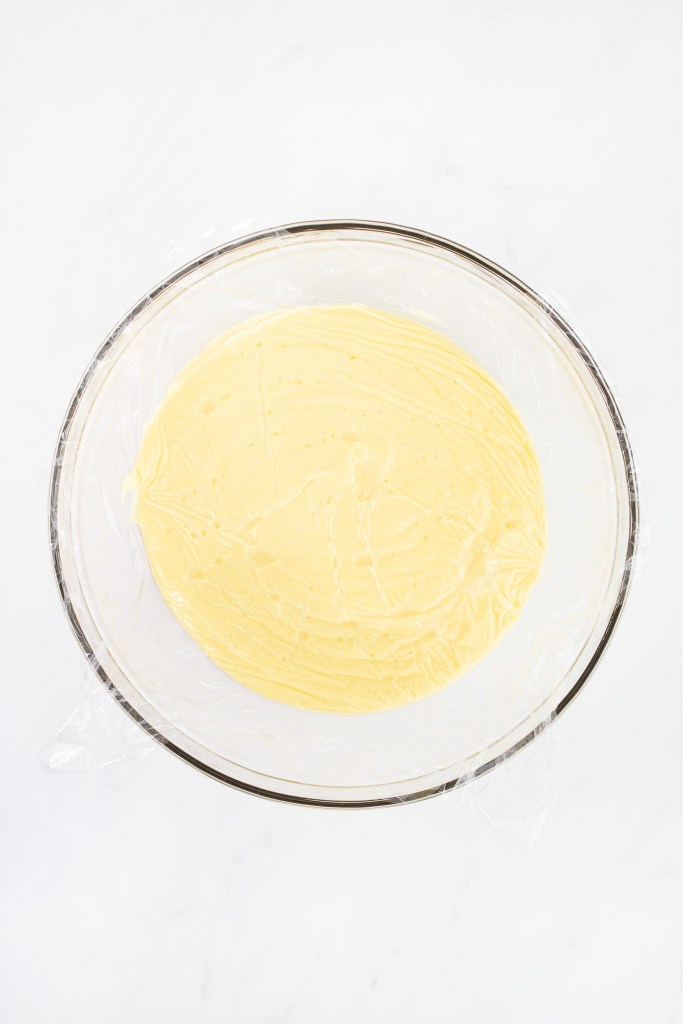
Press the hot pastry cream through a sieve and into a clean bowl. Cover the surface of the pastry cream with plastic wrap to prevent a skin from forming. Allow it to cool for about 30 minutes until it is still warm, but not hot.
While the pastry cream is still warm, whisk vigorously until smooth. Then, spoon the pastry cream into your tart crust. Cover the surface of the cream, once again, with plastic wrap and place the tart into the fridge to cool and set completely.

PREPARING THE APRICOT GLAZE
In a small saucepan (or bowl in the microwave), heat the apricot jam for a few minutes until it loosens.
Press the jam through a sieve to remove any larger pieces of apricot, and return it to your saucepan.


Add in the granulated sugar and cognac, and continue to cook over medium heat until it becomes thick and bubbly.
Turn off the heat, but keep the glaze on the stove to keep it warm while you assemble the tart.
Pro tip: The glaze must be warm enough to remain loose and spreadable with a pastry brush. If it cools and becomes too thick to work with, you can slowly reheat it and add in a splash of water, if necessary.
ASSEMBLING THE TART(S)
Once the pastry cream has fully cooled and set in the tart shell, remove the plastic wrap and cover the surface with your favorite fruit.
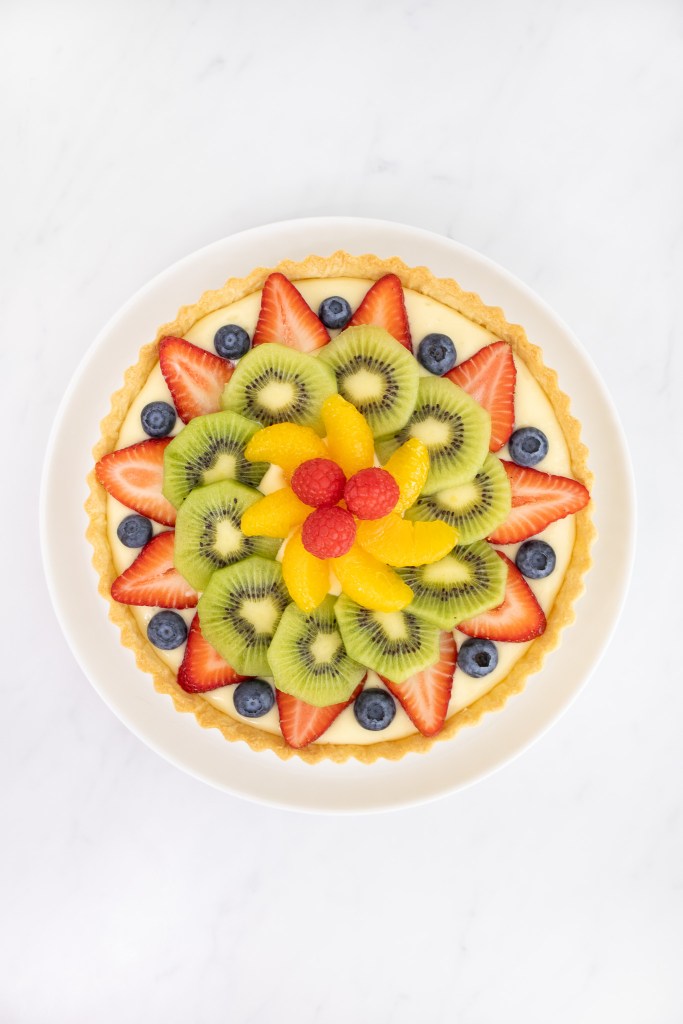
Spread the warm glaze over the top of the fruit to prevent it from drying out.
Serve the assembled tart immediately, or refrigerate it for up to 3 days. However, I recommend serving the tart within 24 hours so that it is optimally fresh and beautiful!
Fruit Tart (Tarte aux Fruits)
Ingredients
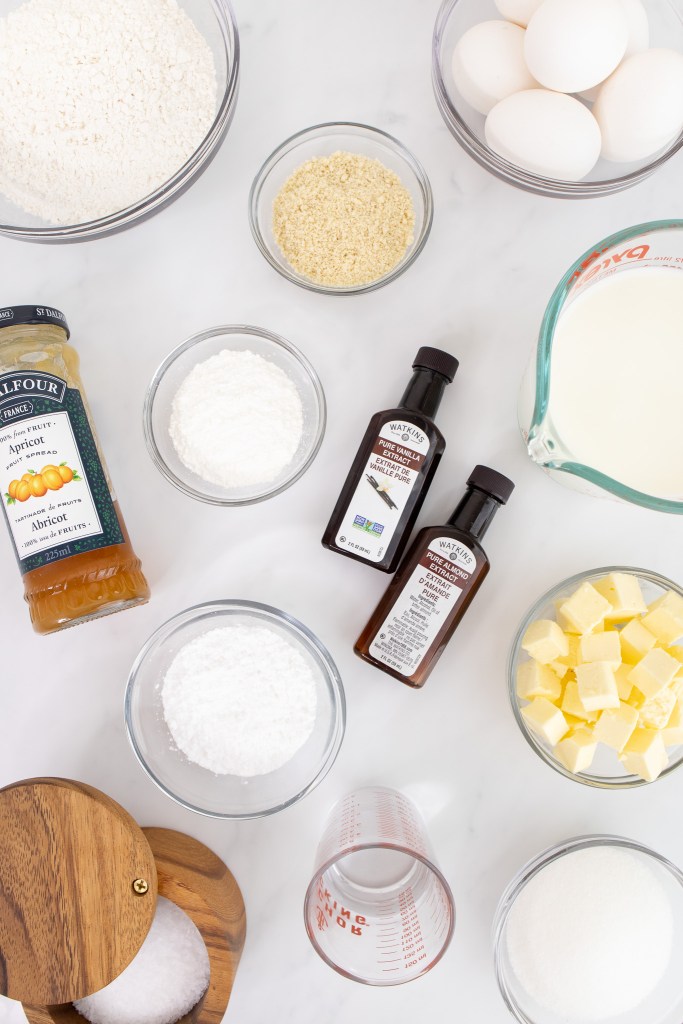
Tart Crust (Pâte Sucrée)
- 1 ½ cups all-purpose flour (spooned and leveled)
- ¼ cup super-fine almond flour
- ½ tsp kosher salt (I use Diamond Crystal)
- ½ cup powdered (icing) sugar
- ½ cup (1 stick) unsalted butter, chilled and cut into ¼" cubes
- 1 large egg yolk
- 2 Tbsp cold water
- ½ tsp pure vanilla extract
- ¼ tsp pure almond extract
Pastry Cream (Crème Pâtissière)
- 2 cups whole milk
- ¼ tsp kosher salt
- ½ cup granulated sugar
- ¼ cup cornstarch
- 5 large egg yolks, at room temperature
- ¼ cup (½ stick) unsalted butter
- 1 ½ tsp pure vanilla extract
Apricot Glaze (recipe also here)
- ½ cup good-quality apricot jam (I like St. Dalfour Apricot Jam)
- 1–2 Tbsp granulated sugar
- 1 Tbsp cognac (optional)
Instructions
Preparing the Tart Crust (Pâte Sucrée)
- In the bowl of a stand mixer, whisk together all-purpose flour, almond flour, salt, and powdered sugar. Set the entire bowl in the freezer for 5 minutes to chill.1 ½ cups all-purpose flour¼ cup super-fine almond flour½ tsp kosher salt½ cup powdered (icing) sugar
- After 5 minutes, add in the very cold, cubed butter. Mix on low (I use the #3 speed on my mixer) until the flour/butter mixture becomes the texture of fine cornmeal or almond meal (about 10–12 minutes).½ cup (1 stick) unsalted butter, chilled and cut into ¼" cubes
- In the meantime, in a small bowl, whisk together egg yolk, cold water, vanilla extract, and almond extract until combined. Set liquid mixture in the refrigerator to chill (while waiting for flour and butter to mix).1 large egg yolk2 Tbsp cold water½ tsp pure vanilla extract¼ tsp pure almond extract
- When the flour/butter mixture is ready, with the mixer still on low speed, slowly drizzle in the liquid mixture. Continue to mix just until the dough comes together and no dry spots remain.
- Pick the dough up with your hands and form it into a smooth ball. (You can knead the dough 2 to 3 times, if necessary, but try not to overwork the dough.)For one large 9" tart: Form the dough into a flat disk.For four small 4" tarts: Form the dough into a rectangular shape (to make it easier to cut into four).
- Wrap the dough in plastic wrap and chill in the refrigerator for 1 hour.
- Remove the dough from the refrigerator and allow it to sit at room temperature for 5 to 10 minutes. (You want the dough to warm up just enough to be pliable so that it doesn’t crack when rolling it out.)
- For one large 9" tart: Follow steps 9 to 17 to form and bake the tart, then skip to step 29 to prepare the pastry cream.For four small 4" tarts: Skip to step 18.
Forming & Baking One 9" Tart (Using a Tart Pan)
- On a lightly floured piece of parchment paper, roll the dough out into a circle that is about ⅛" thick. (I recommend using a rolling pin that has adjustable stoppers to help ensure the dough is an even thickness.)
- Carefully flip the parchment paper over onto the tart pan and peel back the parchment paper from the dough.
- Allow the dough to fall into the tart pan, gently pressing it into the bottom edges and sides of the pan, being careful not to stretch the dough. Using your thumb, press the dough firmly into the sides of the pan, making sure it is uniform in thickness all the way around.
- Using your rolling pin, roll the pin over the top edges of your tart pan to trim off any excess dough. Set the tart pan in the freezer for 30 minutes to allow the dough to chill and firm up.
- Meanwhile, preheat oven to 350℉.
- Remove the tart pan from the freezer and set it on a baking sheet. Press a piece of aluminum foil into the bottom edges and sides of the dough, and fill the foil with pie weights, dried beans, or rice.
- Set the tart pan into the center of the oven and blind bake it for 20 minutes.
- Remove the foil and pie weights, prick the bottom of the tart with the tines of a fork, and place it back into the oven until it turns nice and golden brown (about 10–15 minutes, depending on the size of the pan and thickness of the dough).
- Remove from the oven and place the tart crust (still in the tart pan) on a wire rack. Allow the crust to cool completely.
Forming & Baking Four 4" Small Tarts (Using Perforated Tart Rings)
- I recommend cutting the dough in half and working with half of the dough at a time while the other half is set in the refrigerator to chill. Continue alternating between the two halves of the dough while rolling it out and cutting out the tarts.
- On a lightly floured piece of parchment paper, roll out half the dough out into a rectangle that is about ⅛" thick. (I recommend using a rolling pin that has adjustable stoppers to help ensure the dough is an even thickness.)
- Set the dough (still on the parchment paper) on a cutting board or baking sheet and return to the refrigerator for about 10 minutes to chill and firm up slightly. In the meantime, repeat the previous step with the second half of the dough onto a new lightly floured piece of parchment paper.
- Using a perforated tart ring, cut circles into the dough for the bottom of each tart shell (as you would a cookie cutter), but do not remove the tart ring from the dough. The dough should be firm enough that it sticks to the inside of the tart ring; if it doesn't, gently press the dough into the inner edge of the tart ring. Set the tart rings (with the dough) on a plate with parchment paper and into the freezer while working with the other half.Pro tip: If at any time you need to start over, form the dough back into a ball, re-roll it out again onto parchment paper, and set it back in the refrigerator or freezer to chill for a few minutes before moving on.
- Using a knife, cut out strips (about 1" wide) for the sides of each tart shell. The dough should be chilled and firm enough to work with, but not so cold that it cracks.
- Place the strips around the inner edge of each tart ring. Using your fingers, firmly press the strips into the sides of each tart ring and into the bottom of the tart shell so that the bottom and sides fuse together. (You can use multiple strips for each tart shell, just be sure to firmly press any edges together.)
- Using a paring knife, trim the sides of each tart shell so that the sides are flush with the top of each tart ring. (If the dough has gotten too warm and isn't cutting cleanly, set the whole tart shell into the freezer to chill for a few minutes before trimming the sides.)
- Set the tart shells (still on the plate with parchment paper) into the freezer to chill for 30 minutes.
- Meanwhile, preheat oven to 350℉.
- Set the tart shells on a baking sheet lined with a perforated baking mat or a new piece of parchment paper. Bake in the center of the oven until the shells turn nice and golden brown (about 15–20 minutes, depending on the size of the tart rings and thickness of the dough). The tart shell should shrink slightly, pulling away from the sides of the tart ring.
- Remove the tart shells from the oven and allow them to cool completely on the baking sheet.
Preparing the Pastry Cream (Crème Pâtissière)
- In a large bowl, whisk together sugar and cornstarch. (This helps prevent the cornstarch from forming lumps.)½ cup granulated sugar¼ cup cornstarch
- Add in the egg yolks and continue whisking until the mixture is pale yellow in color and forms a slowly dissolving ribbon on the surface when the whisk is lifted from the mixture.5 large egg yolks, at room temperature
- In a heavy-bottomed saucepan, combine milk and salt. Over low heat, gently heat the milk just until it begins to bubble.2 cups whole milk¼ tsp kosher salt
- Whisking constantly, slowly pour the hot milk into the egg yolk mixture — starting with just small dribbles and continuing with a small, but steady, stream — until all of the milk is incorporated.Pro tip: I recommend setting the large bowl (with the egg yolk mixture) on a kitchen towel so the bowl won’t slide around while you are whisking in the hot milk.
- Pour the mixture back into the saucepan and return it to medium heat. Whisk constantly until the mixture becomes thick and begins to bubble, and then for another 1 to 2 minutes more. (The mixture must be heated enough to activate the cornstarch; otherwise, the pastry cream will be runny when it cools.)
- Remove the mixture from heat and whisk in butter and vanilla. Continue whisking until the butter is fully incorporated.¼ cup (½ stick) unsalted butter1 ½ tsp pure vanilla extract
- Press the hot pastry cream through a sieve and into a clean bowl. To prevent a skin from forming on the surface of the pastry cream, press plastic wrap directly onto the surface. Allow to cool until still warm, but not hot (about 30 minutes).
- While the pastry cream is still warm, whisk vigorously until smooth. Spoon the pastry cream into your tart crust. Once again, to prevent a skin from forming, press plastic wrap directly onto the surface of the tart(s). Set the tart(s) in the refrigerator to set and cool completely.
Preparing the Apricot Glaze
- In a small saucepan (or a microwave-safe bowl), heat apricot jam so it can easily be pressed through a sieve.½ cup good-quality apricot jam
- Press apricot jam through a sieve to remove any larger pieces of apricot.
- In a saucepan, mix sieved apricot jam, sugar, and cognac.1–2 Tbsp granulated sugar1 Tbsp cognac (optional)
- Cook over moderate heat for 3 to 5 minutes, until thickened and sticky.
- Turn off heat, but keep the apricot glaze on the hot stove to keep it warm while you assemble your tart.Pro tip: The apricot glaze must be warm enough to remain loose and spreadable with a pastry brush. If it cools and becomes too thick to work with, slowly reheat it and, if necessary, add in a splash of water.
Assembling the Tart(s)
- Once the pastry cream has fully cooled and set in the tart shell, remove the plastic wrap and cover the surface with your favorite fruit.
- Spread the warm apricot glaze over the top of the fruit. (This prevents the fruit from drying out and gives the final tart a nice, professional look.)
- Serve immediately, or refrigerate for up to 3 days. Ideally, the tart(s) should be served within 24 hours to preserve freshness.